Working With Wallet Smart Contracts
👋 Introduction
Learning how wallets and transactions work on TON before beginning smart contracts development is essential. This knowledge will help developers understand the interaction between wallets, messages, and smart contracts to implement specific development tasks.
It's recommended to get acquainted with Types of Wallet Contracts article before reading this tutorial.
In this section we’ll learn to create operations without using pre-configured functions to understand development workflows. All references necessary for the analysis of this tutorial are located in the references chapter.
💡 Prerequisites
This tutorial requires basic knowledge of JavaScript and TypeScript or Golang. It is also necessary to hold at least 3 TON (which can be stored in an exchange account, a non-custodial wallet, or by using the Telegram bot wallet). It is necessary to have a basic understanding of cell, addresses in TON, blockchain of blockchains to understand this tutorial.
Working with the TON Testnet often leads to deployment errors, difficulty tracking transactions, and unstable network functionality. Therefore, it could be beneficial to complete most development on the TON Mainnet to potentially avoid these issues, which might be necessary to reduce the number of transactions and thereby possibly minimize fees.
💿 Source Code
All code examples used in this tutorial can be found in the following GitHub repository.
✍️ What You Need To Get Started
- Ensure NodeJS is installed.
- Specific Ton libraries are required and include: @ton/ton 13.5.1+, @ton/core 0.49.2+ and @ton/crypto 3.2.0+.
OPTIONAL: If you prefer to use Go instead of JS, it is necessary to install the tonutils-go library and the GoLand IDE to conduct development on TON. This library will be used in this tutorial for the GO version.
- JavaScript
- Golang
npm i --save @ton/ton @ton/core @ton/crypto
go get github.com/xssnick/tonutils-go
go get github.com/xssnick/tonutils-go/adnl
go get github.com/xssnick/tonutils-go/address
⚙ Set Your Environment
In order to create a TypeScript project it's necessary to conduct the following steps in order:
- Create an empty folder (which we’ll name WalletsTutorial).
- Open the project folder using the CLI.
- Use the following commands to set up your project:
npm init -y
npm install typescript @types/node ts-node nodemon --save-dev
npx tsc --init --rootDir src --outDir build \ --esModuleInterop --target es2020 --resolveJsonModule --lib es6 \ --module commonjs --allowJs true --noImplicitAny false --allowSyntheticDefaultImports true --strict false
To help us carry out the next process a ts-node is used to execute TypeScript code directly without precompiling. nodemon is used to restart the node application automatically when file changes in the directory are detected.
- Next, remove these lines from
tsconfig.json:
  "files": [
    "\\",
    "\\"
  ]
- Then, create a
nodemon.jsonconfig in your project root with the following content:
{
  "watch": ["src"],
  "ext": ".ts,.js",
  "ignore": [],
  "exec": "npx ts-node ./src/index.ts"
}
- Add this script to
package.jsoninstead of "test", which is added when the project is created:
"start:dev": "npx nodemon"
- Create
srcfolder in the project root andindex.tsfile in this folder. - Next, the following code should be added:
async function main() {
  console.log("Hello, TON!");
}

main().finally(() => console.log("Exiting..."));
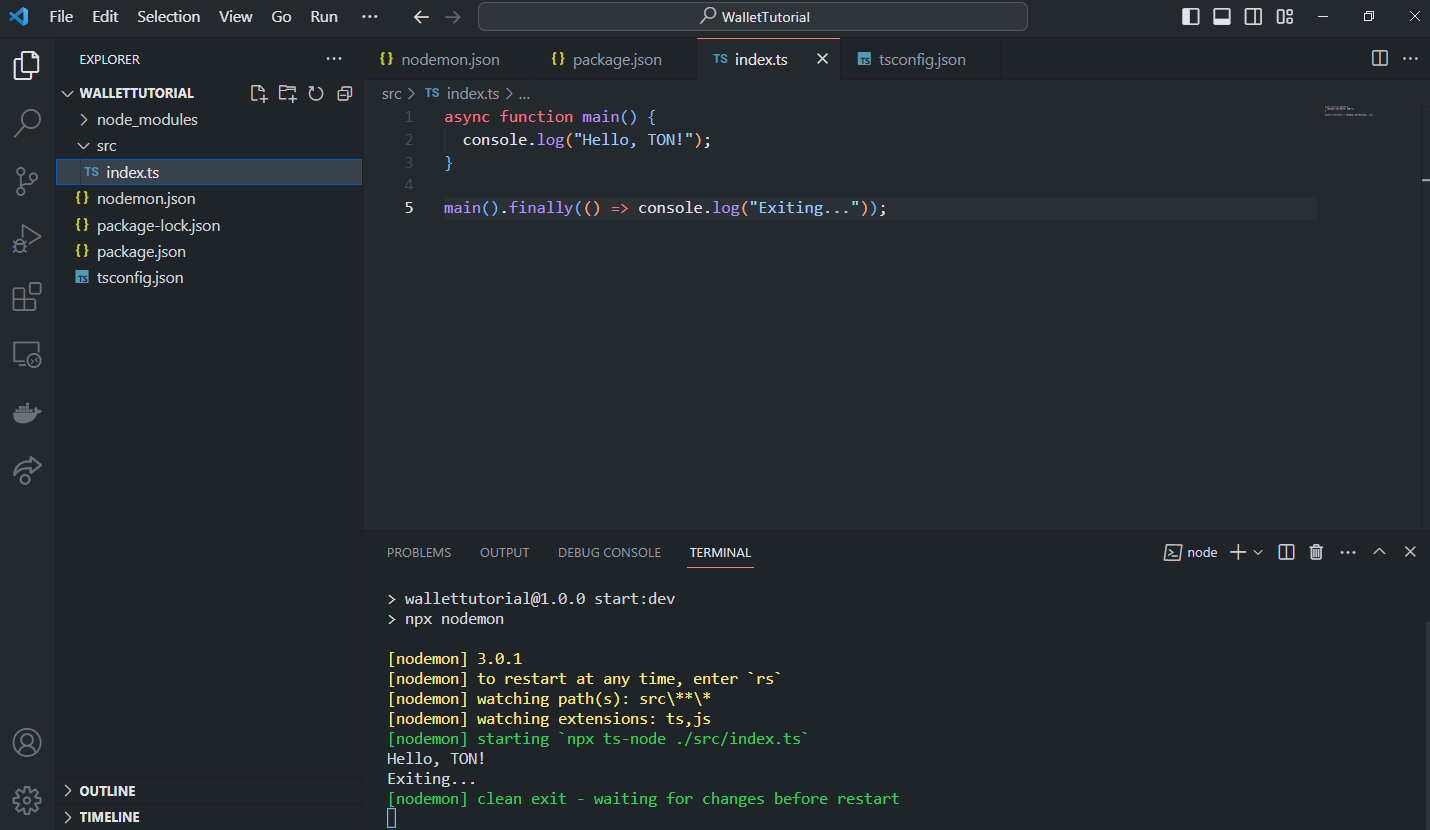
- Run the code using terminal:
npm run start:dev
- Finally, the console output will appear.
The TON Community created an excellent tool for automating all development processes (deployment, contract writing, testing) called Blueprint. However, we will not be needing such a powerful tool, so it is suggested that the instructions above are followed.
**OPTIONAL: ** When using Golang, follow these instructions::
- Install the GoLand IDE.
- Create a project folder and
go.modfile using the following content (the version of Go may need to be changed to conduct this process if the current version being used is outdated):
module main

go 1.20
- Type the following command into the terminal:
go get github.com/xssnick/tonutils-go
- Create the
main.gofile in the root of your project with following content:
package main

import (
	"log"
)

func main() {
	log.Println("Hello, TON!")
}
- Change the name of the module in the
go.modtomain. - Run the code above until the output in the terminal is displayed.
It is also possible to use another IDE since GoLand isn’t free, but it is preferred.
All coding components should be added to the main function that was created in the ⚙ Set Your Environment section.
Additionally, only the imports required for a specific code section will be specified in each new section and new imports will need to be added and combined with old ones.
🚀 Let's Get Started!
In this tutorial we’ll learn which wallets (version’s 3 and 4) are most often used on TON Blockchain and get acquainted with how their smart contracts work. This will allow developers to better understand the different messages types on the TON platform to make it simpler to create messages, send them to the blockchain, deploy wallets, and eventually, be able to work with high-load wallets.
Our main task is to build messages using various objects and functions for @ton/ton, @ton/core, @ton/crypto (ExternalMessage, InternalMessage, Signing etc.) to understand what messages look like on a bigger scale. To carry out this process we'll make use of two main wallet versions (v3 and v4) because of the fact that exchanges, non-custodial wallets, and most users only used these specific versions.
There may be occasions in this tutorial when there is no explanation for particular details. In these cases, more details will be provided in later stages of this tutorial.
IMPORTANT: Throughout this tutorial wallet v3 code is used to better understand the wallet development process. It should be noted that version v3 has two sub-versions: r1 and r2. Currently, only the second version is being used, this means that when we refer to v3 in this document it means v3r2.
💎 TON Blockchain Wallets
All wallets that operate and run on TON Blockchain are actually smart contracts, in the same way, everything operating on TON is a smart contract. Like most blockchains, it is possible to deploy smart contracts on the network and customize them for different uses. Thanks to this feature, full wallet customization is possible. On TON wallet smart contracts help the platform communicate with other smart contract types. However, it is important to consider how wallet communication takes place.
Wallet Communication
Generally, there are two message types on TON Blockchain: internal and external. External messages allow for the ability to send messages to the blockchain from the outside world, thus allowing for the communication with smart contracts that accept such messages. The function responsible for carrying out this process is as follows:
() recv_external(slice in_msg) impure {
    ;; some code
}
Before we dive into more details concerning wallets, let’s look at how wallets accept external messages. On TON, all wallets hold the owner’s public key, seqno, and subwallet_id. When receiving an external message, the wallet uses the get_data() method to retrieve data from the storage portion of the wallet. It then conducts several verification procedures and decides whether to accept the message or not. This process is conducted as follows:
() recv_external(slice in_msg) impure {
  var signature = in_msg~load_bits(512); ;; get signature from the message body
  var cs = in_msg;
  var (subwallet_id, valid_until, msg_seqno) = (cs~load_uint(32), cs~load_uint(32), cs~load_uint(32));  ;; get rest values from the message body
  throw_if(35, valid_until <= now()); ;; check the relevance of the message
  var ds = get_data().begin_parse(); ;; get data from storage and convert it into a slice to be able to read values
  var (stored_seqno, stored_subwallet, public_key) = (ds~load_uint(32), ds~load_uint(32), ds~load_uint(256)); ;; read values from storage
  ds.end_parse(); ;; make sure we do not have anything in ds variable
  throw_unless(33, msg_seqno == stored_seqno);
  throw_unless(34, subwallet_id == stored_subwallet);
  throw_unless(35, check_signature(slice_hash(in_msg), signature, public_key));
  accept_message();
💡 Useful links:
Now let’s take a closer look.
Replay Protection - Seqno
Message replay protection in the wallet smart contract is directly related to the message seqno (Sequence Number) which keeps track of which messages are sent in which order. It is very important that a single message is not repeated from a wallet because it throws off the integrity of the system entirely. If we further examine smart contract code within a wallet, the seqno is typically handled as follows:
throw_unless(33, msg_seqno == stored_seqno);
This line of code above checks the seqno, which comes in the message and checks it with seqno, which is stored in a smart contract. The contract returns an error with 33 exit code if they do not match. So if the sender passed invalid seqno, it means that he made some mistake in the message sequence, and the contract protects against such cases.
It's also essential to consider that external messages can be sent by anyone. This means that if you send 1 TON to someone, someone else can repeat this message. However, when the seqno increases, the previous external message becomes invalid, and no one will be able to repeat it, thus preventing the possibility of stealing your funds.
Signature
As mentioned earlier, wallet smart contracts accept external messages. However, these messages come from the outside world and that data cannot be 100% trusted. Therefore, each wallet stores the owner's public key. The smart contract uses a public key to verify the legitimacy of the message signature when receiving an external message that the owner signed with the private key. This verifies that the message is actually from the contract owner.
To carry out this process, the wallet must first obtain the signature from the incoming message which loads the public key from storage and validates the signature using the following process:
var signature = in_msg~load_bits(512);
var ds = get_data().begin_parse();
var (stored_seqno, stored_subwallet, public_key) = (ds~load_uint(32), ds~load_uint(32), ds~load_uint(256));
throw_unless(35, check_signature(slice_hash(in_msg), signature, public_key));
And if all verification processes are completed correctly, the smart contract accepts the message and processes it:
accept_message();
Because the message comes from the outside world, it does not contain the Toncoin required to pay the transaction fee. When sending TON using the accept_message() function, a gas_credit (at the time of writing its value is 10,000 gas units) is applied which allows the necessary calculations to be carried out for free if the gas does not exceed the gas_credit value. After the accept_message() function is used, all the gas spent (in TON) is taken from the balance of the smart contract. More can be read about this process here.
Transaction Expiration
Another step used to check the validity of external messages is the valid_until field. As you can see from the variable name, this is the time in UNIX before the message is valid. If this verification process fails, the contract completes the processing of the transaction and returns the 35 exit code follows:
var (subwallet_id, valid_until, msg_seqno) = (cs~load_uint(32), cs~load_uint(32), cs~load_uint(32));
throw_if(35, valid_until <= now());
This algorithm works to protect against the susceptibility of various errors when the message is no longer valid but was still sent to the blockchain for an unknown reason.
Wallet v3 and Wallet v4 Differences
The only difference between Wallet v3 and Wallet v4 is that Wallet v4 makes use of plugins that can be installed and deleted. These plugins are special smart contracts which are able to request a specific number of TON at a specific time from a wallet smart contract.
Wallet smart contracts, in turn, will send the required amount of TON in response without the need for the owner to participate. This is similar to the subscription model for which plugins are created. We will not learn these details, because this is out of the scope of this tutorial.
How Wallets facilitate communication with Smart Contracts
As we discussed earlier, a wallet smart contract accepts external messages, validates them and accepts them if all checks are passed. The contract then starts the loop of retrieving messages from the body of external messages then creates internal messages and sends them to the blockchain as follows:
cs~touch();
while (cs.slice_refs()) {
    var mode = cs~load_uint(8); ;; load message mode
    send_raw_message(cs~load_ref(), mode); ;; get each new internal message as a cell with the help of load_ref() and send it
}
On TON, all smart contracts run on the stack-based TON Virtual Machine (TVM). ~ touch() places the variable cs on top of the stack to optimize the running of code for less gas.
Since a maximum of 4 references can be stored in one cell, we can send a maximum of 4 internal messages per external message.
💡 Useful links:
📬 External and Internal Messages
In this section, we’ll learn more about internal and external messages and we’ll create messages and send them to the network to minimize the use of pre-cooked functions.
To carry out this process it is necessary to make use of a ready-made wallet to make the task easier. To accomplish this:
- Install the wallet app (e.g., Tonkeeper is used by the author)
- Switch wallet app to v3r2 address version
- Deposit 1 TON into the wallet
- Send the message to another address (you can send to yourself, to the same wallet).
This way, the Tonkeeper wallet app will deploy the wallet contract and we can use it for the following steps.
At the time of writing, most wallet apps on TON by default use the wallet v4 version. Plugins are not required in this tutorial and we’ll make use of the functionality provided by wallet v3. During use, Tonkeeper allows the user to choose the version of the wallet they want. Therefore, it is recommended to deploy wallet version 3 (wallet v3).
TL-B
As noted, everything in TON Blockchain is a smart contract consisting of cells. To properly serialize and deserialize the data we need standards. To accomplish the serialization and deserialization process, TL-B was created as a universal tool to describe different data types in different ways with different sequences inside cells.
In this section, we’ll examine block.tlb. This file will be very useful during future development, as it describes how different cells should be assembled. In our case specifically, it details the intricacies of internal and external messages.
Basic information will be provided within this guide. For further details, please refer to our TL-B documentation to learn more about TL-B.
CommonMsgInfo
Initially, each message must first store CommonMsgInfo (TL-B) or CommonMsgInfoRelaxed (TL-B). This allows us to define technical details that relate to the message type, message time, recipient address, technical flags, and fees.
By reading block.tlb file, we can notice three types of CommonMsgInfo: int_msg_info$0, ext_in_msg_info$10, ext_out_msg_info$11. We will not go into specific details detailing the specificities of the ext_out_msg_info TL-B structure. That said, it is an external message type that a smart contract can send for using as external logs. For examples of this format, consider having a closer look at the Elector contract.
Looking at TL-B, you’ll notice that only the CommonMsgInfo is available when used with the ext_in_msg_info type. This is because message fields such as src, created_lt, created_at, and others are rewritten by validators during transaction handling. In this case, the src field in message is most important because when messages are sent, the sender is unknown, and is written by validators during verification. This ensures that the address in the src field is correct and cannot be manipulated.
However, the CommonMsgInfo structure only supports the MsgAddress specification, but the sender’s address is typically unknown and it is required to write the addr_none (two zero bits 00). In this case, the CommonMsgInfoRelaxed structure is used, which supports the addr_none address. For the ext_in_msg_info (used for incoming external messages), the CommonMsgInfo structure is used because these message types don’t make use of a sender and always use the MsgAddressExt structure (the addr_none$00 meaning two zero bits), which means there is no need to overwrite the data.
The numbers after $ symbol are the bits that are required to store at the beginning of a certain structure, for further identification of these structures during reading (deserialization).
Internal Message Creation
Internal messages are used to send messages between contracts. When analyzing various contract types (such as NFTs and Jetons) that send messages where the writing of contracts is considered, the following lines of code are often used:
var msg = begin_cell()
  .store_uint(0x18, 6) ;; or 0x10 for non-bounce
  .store_slice(to_address)
  .store_coins(amount)
  .store_uint(0, 1 + 4 + 4 + 64 + 32 + 1 + 1) ;; default message headers (see sending messages page)
  ;; store something as a body
Let’s first consider 0x18 and 0x10 (x - hexadecimal), which are hexadecimal numbers laid out in the following manner (given that we allocate 6 bits): 011000 and 010000. This means that the code above can be overwritten as follows:
var msg = begin_cell()
  .store_uint(0, 1) ;; this bit indicates that we send an internal message according to int_msg_info$0
  .store_uint(1, 1) ;; IHR Disabled
  .store_uint(1, 1) ;; or .store_uint(0, 1) for 0x10 | bounce
  .store_uint(0, 1) ;; bounced
  .store_uint(0, 2) ;; src -> two zero bits for addr_none
  .store_slice(to_address)
  .store_coins(amount)
  .store_uint(0, 1 + 4 + 4 + 64 + 32 + 1 + 1) ;; default message headers (see sending messages page)
  ;; store something as a body
Now let’s go through each option in detail:
| Option | Explanation |
|---|---|
| IHR Disabled | Currently, this option is disabled (which means we store 1) because Instant Hypercube Routing is not fully implemented. In addition, this will be needed when a large number of Shardchains are live on the network. More can be read about the IHR Disabled option in the tblkch.pdf (chapter 2). |
| Bounce | While sending messages, a variety of errors can occur during smart contract processing. To avoid losing TON, it is necessary to set the Bounce option to 1 (true). In this case, if any contract errors occur during transaction processing, the message will be returned to the sender, and the same amount of TON will be received minus fees. More can be read about non-bounceable messages here. |
| Bounced | Bounced messages are messages that are returned to the sender because an error occurred while processing the transaction with a smart contract. This option tells you whether the message received is bounced or not. |
| Src | The Src is the sender address. In this case, two zero bits are written to indicate the addr_none address. |
The next two lines of code:
...
.store_slice(to_address)
.store_coins(amount)
...
- we specify the recipient and the number of TON to be sent.
Finally, let’s look at the remaining lines of code:
...
  .store_uint(0, 1) ;; Extra currency
  .store_uint(0, 4) ;; IHR fee
  .store_uint(0, 4) ;; Forwarding fee
  .store_uint(0, 64) ;; Logical time of creation
  .store_uint(0, 32) ;; UNIX time of creation
  .store_uint(0, 1) ;; State Init
  .store_uint(0, 1) ;; Message body
  ;; store something as a body
| Option | Explanation |
|---|---|
| Extra currency | This is a native implementation of existing jettons and is not currently in use. |
| IHR fee | As mentioned, the IHR is not currently in use, so this fee is always zero. More can be read about this in the tblkch.pdf (3.1.8). |
| Forwarding fee | A forwarding message fee. More can be read about this in the fees documentation. |
| Logical time of creation | The time used to create the correct messages queue. |
| UNIX time of creation | The time the message was created in UNIX. |
| State Init | Code and source data for deploying a smart contract. If the bit is set to 0, it means that we do not have a State Init. But if it is set to 1, then another bit needs to be written which indicates whether the State Init is stored in the same cell (0) or written as a reference (1). |
| Message body | This part defines how the message body is stored. At times the message body is too large to fit into the message itself. In this case, it should be stored as a reference whereby the bit is set to 1 to show that the body is used as a reference. If the bit is 0, the body is in the same cell as the message. |
The values outlined above (including src) excluding the State Init and the Message Body bits, are rewritten by validators.
If the number value fits within fewer bits than is specified, then the missing zeros are added to the left side of the value. For example, 0x18 fits within 5 bits -> 11000. However, since 6 bits were specified, the end result becomes 011000.
Next, we’ll begin preparing a message, which will be sent Toncoins to another wallet v3. First, let’s say a user wants to send 0.5 TON to themselves with the text "Hello, TON!", refer to this section of our documentation to learn (How to send message with a comment).
- JavaScript
- Golang
import { beginCell } from '@ton/core';

let internalMessageBody = beginCell()
  .storeUint(0, 32) // write 32 zero bits to indicate that a text comment will follow
  .storeStringTail("Hello, TON!") // write our text comment
  .endCell();
import (
	"github.com/xssnick/tonutils-go/tvm/cell"
)

internalMessageBody := cell.BeginCell().
  MustStoreUInt(0, 32). // write 32 zero bits to indicate that a text comment will follow
  MustStoreStringSnake("Hello, TON!"). // write our text comment
  EndCell()
Above we created an InternalMessageBody in which the body of our message is stored. Note that when storing text that does not fit into a single Cell (1023 bits), it is necessary to split the data into several cells according to the following documentation. However, in this case the high-level libraries creates cells according to requirements, so at this stage there is no need to worry about it.
Next, the InternalMessage is created according to the information we have studied earlier as follows:
- JavaScript
- Golang
import { toNano, Address } from '@ton/ton';

const walletAddress = Address.parse('put your wallet address');

let internalMessage = beginCell()
  .storeUint(0, 1) // indicate that it is an internal message -> int_msg_info$0
  .storeBit(1) // IHR Disabled
  .storeBit(1) // bounce
  .storeBit(0) // bounced
  .storeUint(0, 2) // src -> addr_none
  .storeAddress(walletAddress)
  .storeCoins(toNano("0.2")) // amount
  .storeBit(0) // Extra currency
  .storeCoins(0) // IHR Fee
  .storeCoins(0) // Forwarding Fee
  .storeUint(0, 64) // Logical time of creation
  .storeUint(0, 32) // UNIX time of creation
  .storeBit(0) // No State Init
  .storeBit(1) // We store Message Body as a reference
  .storeRef(internalMessageBody) // Store Message Body as a reference
  .endCell();
import (
  "github.com/xssnick/tonutils-go/address"
  "github.com/xssnick/tonutils-go/tlb"
)

walletAddress := address.MustParseAddr("put your address")

internalMessage := cell.BeginCell().
  MustStoreUInt(0, 1). // indicate that it is an internal message -> int_msg_info$0
  MustStoreBoolBit(true). // IHR Disabled
  MustStoreBoolBit(true). // bounce
  MustStoreBoolBit(false). // bounced
  MustStoreUInt(0, 2). // src -> addr_none
  MustStoreAddr(walletAddress).
  MustStoreCoins(tlb.MustFromTON("0.2").NanoTON().Uint64()).   // amount
  MustStoreBoolBit(false). // Extra currency
  MustStoreCoins(0). // IHR Fee
  MustStoreCoins(0). // Forwarding Fee
  MustStoreUInt(0, 64). // Logical time of creation
  MustStoreUInt(0, 32). // UNIX time of creation
  MustStoreBoolBit(false). // No State Init
  MustStoreBoolBit(true). // We store Message Body as a reference
  MustStoreRef(internalMessageBody). // Store Message Body as a reference
  EndCell()
Creating a Message
It is necessary to retrieve the seqno (sequence number) of our wallet smart contract. To accomplish this, a Client is created which will be used to send a request to run the Get method "seqno" of our wallet. It is also necessary to add a seed phrase (which you saved during creating a wallet here) to sign our message via the following steps:
- JavaScript
- Golang
import { TonClient } from '@ton/ton';
import { mnemonicToWalletKey } from '@ton/crypto';

const client = new TonClient({
  endpoint: "https://toncenter.com/api/v2/jsonRPC", // you can replace it on https://testnet.toncenter.com/api/v2/jsonRPC for testnet
  apiKey: "put your api key" // you can get an api key from @tonapibot bot in Telegram
});

const mnemonic = 'put your mnemonic'; // word1 word2 word3
let getMethodResult = await client.runMethod(walletAddress, "seqno"); // run "seqno" GET method from your wallet contract
let seqno = getMethodResult.stack.readNumber(); // get seqno from response

const mnemonicArray = mnemonic.split(' '); // get array from string
const keyPair = await mnemonicToWalletKey(mnemonicArray); // get Secret and Public keys from mnemonic
import (
  "context"
  "crypto/ed25519"
  "crypto/hmac"
  "crypto/sha512"
  "github.com/xssnick/tonutils-go/liteclient"
  "github.com/xssnick/tonutils-go/ton"
  "golang.org/x/crypto/pbkdf2"
  "log"
  "strings"
)

mnemonic := strings.Split("put your mnemonic", " ") // get our mnemonic as array

connection := liteclient.NewConnectionPool()
configUrl := "https://ton-blockchain.github.io/global.config.json"
err := connection.AddConnectionsFromConfigUrl(context.Background(), configUrl)
if err != nil {
  panic(err)
}
client := ton.NewAPIClient(connection) // create client

block, err := client.CurrentMasterchainInfo(context.Background()) // get current block, we will need it in requests to LiteServer
if err != nil {
  log.Fatalln("CurrentMasterchainInfo err:", err.Error())
  return
}

getMethodResult, err := client.RunGetMethod(context.Background(), block, walletAddress, "seqno") // run "seqno" GET method from your wallet contract
if err != nil {
  log.Fatalln("RunGetMethod err:", err.Error())
  return
}
seqno := getMethodResult.MustInt(0) // get seqno from response

// The next three lines will extract the private key using the mnemonic phrase. We will not go into cryptographic details. With the tonutils-go library, this is all implemented, but we’re doing it again to get a full understanding.
mac := hmac.New(sha512.New, []byte(strings.Join(mnemonic, " ")))
hash := mac.Sum(nil)
k := pbkdf2.Key(hash, []byte("TON default seed"), 100000, 32, sha512.New) // In TON libraries "TON default seed" is used as salt when getting keys

privateKey := ed25519.NewKeyFromSeed(k)
Therefore, the seqno, keys, and internal message need to be sent. Now we need to create a message for our wallet and store the data in this message in the sequence used at the beginning of the tutorial. This is accomplished as follows:
- JavaScript
- Golang
import { sign } from '@ton/crypto';

let toSign = beginCell()
  .storeUint(698983191, 32) // subwallet_id | We consider this further
  .storeUint(Math.floor(Date.now() / 1e3) + 60, 32) // Message expiration time, +60 = 1 minute
  .storeUint(seqno, 32) // store seqno
  .storeUint(3, 8) // store mode of our internal message
  .storeRef(internalMessage); // store our internalMessage as a reference

let signature = sign(toSign.endCell().hash(), keyPair.secretKey); // get the hash of our message to wallet smart contract and sign it to get signature

let body = beginCell()
  .storeBuffer(signature) // store signature
  .storeBuilder(toSign) // store our message
  .endCell();
import (
  "time"
)

toSign := cell.BeginCell().
  MustStoreUInt(698983191, 32). // subwallet_id | We consider this further
  MustStoreUInt(uint64(time.Now().UTC().Unix()+60), 32). // Message expiration time, +60 = 1 minute
  MustStoreUInt(seqno.Uint64(), 32). // store seqno
  MustStoreUInt(uint64(3), 8). // store mode of our internal message
  MustStoreRef(internalMessage) // store our internalMessage as a reference

signature := ed25519.Sign(privateKey, toSign.EndCell().Hash()) // get the hash of our message to wallet smart contract and sign it to get signature

body := cell.BeginCell().
  MustStoreSlice(signature, 512). // store signature
  MustStoreBuilder(toSign). // store our message
  EndCell()
Note that here no .endCell() was used in the definition of the toSign. The fact is that in this case it is necessary to transfer toSign content directly to the message body. If writing a cell was required, it would have to be stored as a reference.
In addition to basic verification process we learned bellow for the Wallet V3, Wallet V4 smart contracts extracts the opcode to determine whether a simple translation or a message associated with the plugin is required. To match this version, it is necessary to add the storeUint(0, 8). (JS/TS), MustStoreUInt(0, 8). (Golang) functions after writing the seqno (sequence number) and before specifying the transaction mode.
External Message Creation
To deliver any internal message to a blockchain from the outside world, it is necessary to send it within an external message. As we have previously considered, it is necessary to only make use of the ext_in_msg_info$10 structure, as the goal is to send an external message to our contract. Now, let's create an external message that will be sent to our wallet:
- JavaScript
- Golang
let externalMessage = beginCell()
  .storeUint(0b10, 2) // 0b10 -> 10 in binary
  .storeUint(0, 2) // src -> addr_none
  .storeAddress(walletAddress) // Destination address
  .storeCoins(0) // Import Fee
  .storeBit(0) // No State Init
  .storeBit(1) // We store Message Body as a reference
  .storeRef(body) // Store Message Body as a reference
  .endCell();
externalMessage := cell.BeginCell().
  MustStoreUInt(0b10, 2). // 0b10 -> 10 in binary
  MustStoreUInt(0, 2). // src -> addr_none
  MustStoreAddr(walletAddress). // Destination address
  MustStoreCoins(0). // Import Fee
  MustStoreBoolBit(false). // No State Init
  MustStoreBoolBit(true). // We store Message Body as a reference
  MustStoreRef(body). // Store Message Body as a reference
  EndCell()
| Option | Explanation |
|---|---|
| Src | The sender address. Since an incoming external message cannot have a sender, there will always be 2 zero bits (an addr_none TL-B). |
| Import Fee | The fee used to pay for importing incoming external messages. |
| State Init | Unlike the Internal Message, the State Init within the external message is needed to deploy a contract from the outside world. The State Init used in conjunction with the Internal Message allows one contract to deploy another. |
| Message Body | The message that must be sent to the contract for processing. |
0b10 (b - binary) denotes a binary record. In this process, two bits are stored: 1 and 0. Thus we specify that it's ext_in_msg_info$10.
Now we have a completed message that is ready to be sent to our contract. To accomplish this, it should first be serialized to a BOC (Bag of Cells), then be sent using the following code:
- JavaScript
- Golang
console.log(externalMessage.toBoc().toString("base64"))

client.sendFile(externalMessage.toBoc());
import (
  "encoding/base64"
  "github.com/xssnick/tonutils-go/tl"
)

log.Println(base64.StdEncoding.EncodeToString(externalMessage.ToBOCWithFlags(false)))

var resp tl.Serializable
err = client.Client().QueryLiteserver(context.Background(), ton.SendMessage{Body: externalMessage.ToBOCWithFlags(false)}, &resp)

if err != nil {
  log.Fatalln(err.Error())
  return
}
💡 Useful link:
As a result, we got the output of our BOC in the console and the message sent to our wallet. By copying the base64 encoded string, it is possible to manually send our message and retrieve the hash using toncenter.
👛 Deploying a Wallet
We have learned the basics of creating messages, which will now be helpful for deploying the wallet. In the past, we have deployed wallet via wallet app, but in this case we’ll need to deploy our wallet manually.
In this section we’ll go over how to create a wallet (wallet v3) from scratch. You’ll learn how to compile the code for a wallet smart contract, generate a mnemonic phrase, receive a wallet address, and deploy a wallet using external messages and State Init (state initialization).
Generating a Mnemonic
The first thing needed to correctly create a wallet is to retrieve a private and public key. To accomplish this task, it is necessary to generate a mnemonic seed phrase and then extract private and public keys using cryptographic libraries.
This is accomplished as follows:
- JavaScript
- Golang
import { mnemonicToWalletKey, mnemonicNew } from '@ton/crypto';

// const mnemonicArray = 'put your mnemonic'.split(' ') // get our mnemonic as array
const mnemonicArray = await mnemonicNew(24); // 24 is the number of words in a seed phrase
const keyPair = await mnemonicToWalletKey(mnemonicArray); // extract private and public keys from mnemonic
console.log(mnemonicArray) // if we want, we can print our mnemonic
import (
	"crypto/ed25519"
	"crypto/hmac"
	"crypto/sha512"
	"log"
	"github.com/xssnick/tonutils-go/ton/wallet"
	"golang.org/x/crypto/pbkdf2"
	"strings"
)

// mnemonic := strings.Split("put your mnemonic", " ") // get our mnemonic as array
mnemonic := wallet.NewSeed() // get new mnemonic

// The following three lines will extract the private key using the mnemonic phrase. We will not go into cryptographic details. It has all been implemented in the tonutils-go library, but it immediately returns the finished object of the wallet with the address and ready methods. So we’ll have to write the lines to get the key separately. Goland IDE will automatically import all required libraries (crypto, pbkdf2 and others).
mac := hmac.New(sha512.New, []byte(strings.Join(mnemonic, " ")))
hash := mac.Sum(nil)
k := pbkdf2.Key(hash, []byte("TON default seed"), 100000, 32, sha512.New) // In TON libraries "TON default seed" is used as salt when getting keys
// 32 is a key len

privateKey := ed25519.NewKeyFromSeed(k) // get private key
publicKey := privateKey.Public().(ed25519.PublicKey) // get public key from private key
log.Println(publicKey) // print publicKey so that at this stage the compiler does not complain that we do not use our variable
log.Println(mnemonic) // if we want, we can print our mnemonic
The private key is needed to sign messages and the public key is stored in the wallet’s smart contract.
It is necessary to output the generated mnemonic seed phrase to the console then save and use it (as detailed in the previous section) in order to use the same key pair each time the wallet’s code is run.
Subwallet IDs
One of the most notable benefits of wallets being smart contracts is the ability to create a vast number of wallets using just one private key. This is because the addresses of smart contracts on TON Blockchain are computed using several factors including the stateInit. The stateInit contains the code and initial data, which is stored in the blockchain’s smart contract storage.
By changing just one bit within the stateInit, a different address can be generated. That is why the subwallet_id was initially created. The subwallet_id is stored in the contract storage and it can be used to create many different wallets (with different subwallet IDs) with one private key. This functionality can be very useful when integrating various wallet types with centralized service such as exchanges.
The default subwallet_id value is 698983191 according to the line of code below taken from the TON Blockchain’s source code:
res.wallet_id = td::as<td::uint32>(res.config.zero_state_id.root_hash.as_slice().data());
It is possible to retrieve genesis block information (zero_state) from the configuration file. Understanding the complexities and details of this is not necessary but it's important to remember that the default value of the subwallet_id is 698983191.
Each wallet contract checks the subwallet_id field for external messages to avoid instances when requests were sent to wallet with another ID:
var (subwallet_id, valid_until, msg_seqno) = (cs~load_uint(32), cs~load_uint(32), cs~load_uint(32));
var (stored_seqno, stored_subwallet, public_key) = (ds~load_uint(32), ds~load_uint(32), ds~load_uint(256));
throw_unless(34, subwallet_id == stored_subwallet);
We will need to add the above value to the initial data of the contract, so the variable needs to be saved as follows:
- JavaScript
- Golang
const subWallet = 698983191;
var subWallet uint64 = 698983191
Compiling Wallet Code
Now that we have the private and public keys and the subwallet_id clearly defined we need to compile the wallet code. To accomplish this, we’ll use the wallet v3 code from the official repository.
To compile wallet code it is necessary to use the @ton-community/func-js library.
Using this library it allows us to compile FunC code and retrieve a cell containing the code. To get started, it is necessary to install the library and save (--save) it to the package.json as follows:
npm i --save @ton-community/func-js
We’ll only use JavaScript to compile code, as the libraries for compiling code are JavaScript based. However, after compiling is finalized, as long as we have the base64 output of our cell, it is possible to use this compiled code in languages such as Go and others.
First, we need to create two files: wallet_v3.fc and stdlib.fc. The compiler works with the stdlib.fc library. All necessary and basic functions, which correspond with the asm instructions were created in the library. The stdlib.fc file can be downloaded here. In the wallet_v3.fc file it is necessary to copy the code above.
Now we have the following structure for the project we are creating:
.
├── src/
│   ├── main.ts
│   ├── wallet_v3.fc
│   └── stdlib.fc
├── nodemon.json
├── package-lock.json
├── package.json
└── tsconfig.json
It’s fine if your IDE plugin conflicts with the () set_seed(int) impure asm "SETRAND"; in the stdlib.fc file.
Remember to add the following line to the beginning of the wallet_v3.fc file to indicate that the functions from the stdlib will be used below:
#include "stdlib.fc";
Now let’s write code to compile our smart contract and run it using the npm run start:dev:
import { compileFunc } from '@ton-community/func-js';
import fs from 'fs'; // we use fs for reading content of files
import { Cell } from '@ton/core';

const result = await compileFunc({
targets: ['wallet_v3.fc'], // targets of your project
sources: {
    "stdlib.fc": fs.readFileSync('./src/stdlib.fc', { encoding: 'utf-8' }),
    "wallet_v3.fc": fs.readFileSync('./src/wallet_v3.fc', { encoding: 'utf-8' }),
}
});

if (result.status === 'error') {
console.error(result.message)
return;
}

const codeCell = Cell.fromBoc(Buffer.from(result.codeBoc, "base64"))[0]; // get buffer from base64 encoded BOC and get cell from this buffer

// now we have base64 encoded BOC with compiled code in result.codeBoc
console.log('Code BOC: ' + result.codeBoc);
console.log('\nHash: ' + codeCell.hash().toString('base64')); // get the hash of cell and convert in to base64 encoded string. We will need it further
The result will be the following output in the terminal:
Code BOC: te6ccgEBCAEAhgABFP8A9KQT9LzyyAsBAgEgAgMCAUgEBQCW8oMI1xgg0x/TH9MfAvgju/Jj7UTQ0x/TH9P/0VEyuvKhUUS68qIE+QFUEFX5EPKj+ACTINdKltMH1AL7AOgwAaTIyx/LH8v/ye1UAATQMAIBSAYHABe7Oc7UTQ0z8x1wv/gAEbjJftRNDXCx+A==

Hash: idlku00WfSC36ujyK2JVT92sMBEpCNRUXOGO4sJVBPA=
Once this is completed it is possible to retrieve the same cell (using the base64 encoded output) with our wallet code using other libraries and languages:
- Golang
import (
  "encoding/base64"
  "github.com/xssnick/tonutils-go/tvm/cell"
)

base64BOC := "te6ccgEBCAEAhgABFP8A9KQT9LzyyAsBAgEgAgMCAUgEBQCW8oMI1xgg0x/TH9MfAvgju/Jj7UTQ0x/TH9P/0VEyuvKhUUS68qIE+QFUEFX5EPKj+ACTINdKltMH1AL7AOgwAaTIyx/LH8v/ye1UAATQMAIBSAYHABe7Oc7UTQ0z8x1wv/gAEbjJftRNDXCx+A==" // save our base64 encoded output from compiler to variable
codeCellBytes, _ := base64.StdEncoding.DecodeString(base64BOC) // decode base64 in order to get byte array
codeCell, err := cell.FromBOC(codeCellBytes) // get cell with code from byte array
if err != nil { // check if there are any error
  panic(err)
}

log.Println("Hash:", base64.StdEncoding.EncodeToString(codeCell.Hash())) // get the hash of our cell, encode it to base64 because it has []byte type and output to the terminal
The result will be the following output in the terminal:
idlku00WfSC36ujyK2JVT92sMBEpCNRUXOGO4sJVBPA=
After the above processes are complete it is confirmed that the correct code is being used within our cell because the hashes match.
Creating the State Init for Deployment
Before building a message it is important to understand what a State Init is. First let’s go through the TL-B scheme:
| Option | Explanation |
|---|---|
| split_depth | This option is intended for highly loaded smart contracts that can be split and located on several shardchains. More information detailing how this works can be found in the tblkch.pdf (4.1.6). Only a 0 bit is stored since it is being used only within a wallet smart contract. |
| special | Used for TicTok. These smart contracts are automatically called for each block and are not needed for regular smart contracts. Information about this can be found in this section or in tblkch.pdf (4.1.6). Only a 0 bit is stored within this specification because we do not need such a function. |
| code | 1 bit means the presence of the smart contract code as a reference. |
| data | 1 bit means the presence of the smart contract data as a reference. |
| library | A library that operates on the masterchain and can be used by different smart contracts. This will not be used for wallet, so its bit is set to 0. Information about this can be found in tblkch.pdf (1.8.4). |
Next we’ll prepare the initial data, which will be present in our contract’s storage immediately after deployment:
- JavaScript
- Golang
import { beginCell } from '@ton/core';

const dataCell = beginCell()
  .storeUint(0, 32) // Seqno
  .storeUint(698983191, 32) // Subwallet ID
  .storeBuffer(keyPair.publicKey) // Public Key
  .endCell();
dataCell := cell.BeginCell().
  MustStoreUInt(0, 32). // Seqno
  MustStoreUInt(698983191, 32). // Subwallet ID
  MustStoreSlice(publicKey, 256). // Public Key
  EndCell()
At this stage, both the contract code and its initial data is present. With this data, we can produce our wallet address. The address of the wallet depends on the State Init, which includes the code and initial data.
- JavaScript
- Golang
import { Address } from '@ton/core';

const stateInit = beginCell()
  .storeBit(0) // No split_depth
  .storeBit(0) // No special
  .storeBit(1) // We have code
  .storeRef(codeCell)
  .storeBit(1) // We have data
  .storeRef(dataCell)
  .storeBit(0) // No library
  .endCell();

const contractAddress = new Address(0, stateInit.hash()); // get the hash of stateInit to get the address of our smart contract in workchain with ID 0
console.log(`Contract address: ${contractAddress.toString()}`); // Output contract address to console
import (
  "github.com/xssnick/tonutils-go/address"
)

stateInit := cell.BeginCell().
  MustStoreBoolBit(false). // No split_depth
  MustStoreBoolBit(false). // No special
  MustStoreBoolBit(true). // We have code
  MustStoreRef(codeCell).
  MustStoreBoolBit(true). // We have data
  MustStoreRef(dataCell).
  MustStoreBoolBit(false). // No library
  EndCell()

contractAddress := address.NewAddress(0, 0, stateInit.Hash()) // get the hash of stateInit to get the address of our smart contract in workchain with ID 0
log.Println("Contract address:", contractAddress.String()) // Output contract address to console
Using the State Init, we can now build the message and send it to the blockchain.
To carry out this process, a minimum wallet balance of 0.1 TON is required (the balance can be less, but this amount is guaranteed to be sufficient). To accomplish this, we’ll need to run the code mentioned earlier in the tutorial, obtain the correct wallet address, and send 0.1 TON to this address. Alternatively, you can send this sum manually via your wallet app before sending the deployment message itself.
Deployment by external messages is presented here mostly for educational purposes; in practice, it's much more convenient to deploy smart contracts via Wallets, which will be described later.
Let’s start with building the message similar to the one we built in the previous section:
- JavaScript
- Golang
import { sign } from '@ton/crypto';
import { toNano } from '@ton/core';

const internalMessageBody = beginCell()
  .storeUint(0, 32)
  .storeStringTail("Hello, TON!")
  .endCell();

const internalMessage = beginCell()
  .storeUint(0x10, 6) // no bounce
  .storeAddress(Address.parse("put your first wallet address from were you sent 0.1 TON"))
  .storeCoins(toNano("0.03"))
  .storeUint(1, 1 + 4 + 4 + 64 + 32 + 1 + 1) // We store 1 that means we have body as a reference
  .storeRef(internalMessageBody)
  .endCell();

// message for our wallet
const toSign = beginCell()
  .storeUint(subWallet, 32)
  .storeUint(Math.floor(Date.now() / 1e3) + 60, 32)
  .storeUint(0, 32) // We put seqno = 0, because after deploying wallet will store 0 as seqno
  .storeUint(3, 8)
  .storeRef(internalMessage);

const signature = sign(toSign.endCell().hash(), keyPair.secretKey);
const body = beginCell()
  .storeBuffer(signature)
  .storeBuilder(toSign)
  .endCell();
import (
  "github.com/xssnick/tonutils-go/tlb"
  "time"
)

internalMessageBody := cell.BeginCell().
  MustStoreUInt(0, 32).
  MustStoreStringSnake("Hello, TON!").
  EndCell()

internalMessage := cell.BeginCell().
  MustStoreUInt(0x10, 6). // no bounce
  MustStoreAddr(address.MustParseAddr("put your first wallet address from were you sent 0.1 TON")).
  MustStoreBigCoins(tlb.MustFromTON("0.03").NanoTON()).
  MustStoreUInt(1, 1 + 4 + 4 + 64 + 32 + 1 + 1). // We store 1 that means we have body as a reference
  MustStoreRef(internalMessageBody).
  EndCell()

// message for our wallet
toSign := cell.BeginCell().
  MustStoreUInt(subWallet, 32).
  MustStoreUInt(uint64(time.Now().UTC().Unix()+60), 32).
  MustStoreUInt(0, 32). // We put seqno = 0, because after deploying wallet will store 0 as seqno
  MustStoreUInt(3, 8).
  MustStoreRef(internalMessage)

signature := ed25519.Sign(privateKey, toSign.EndCell().Hash())
body := cell.BeginCell().
  MustStoreSlice(signature, 512).
  MustStoreBuilder(toSign).
	EndCell()
After this is completed the result is the correct State Init and Message Body.
Sending An External Message
The main difference will be in the presence of the external message, because the State Init is stored to help carry out correct contract deployment. Since the contract does not have its own code yet, it cannot process any internal messages. Therefore, next we send its code and the initial data after it is successfully deployed so it can process our message with "Hello, TON!" comment:
- JavaScript
- Golang
const externalMessage = beginCell()
  .storeUint(0b10, 2) // indicate that it is an incoming external message
  .storeUint(0, 2) // src -> addr_none
  .storeAddress(contractAddress)
  .storeCoins(0) // Import fee
  .storeBit(1) // We have State Init
  .storeBit(1) // We store State Init as a reference
  .storeRef(stateInit) // Store State Init as a reference
  .storeBit(1) // We store Message Body as a reference
  .storeRef(body) // Store Message Body as a reference
  .endCell();
externalMessage := cell.BeginCell().
  MustStoreUInt(0b10, 2). // indicate that it is an incoming external message
  MustStoreUInt(0, 2). // src -> addr_none
  MustStoreAddr(contractAddress).
  MustStoreCoins(0). // Import fee
  MustStoreBoolBit(true). // We have State Init
  MustStoreBoolBit(true).  // We store State Init as a reference
  MustStoreRef(stateInit). // Store State Init as a reference
  MustStoreBoolBit(true). // We store Message Body as a reference
  MustStoreRef(body). // Store Message Body as a reference
  EndCell()
Finally, we can send our message to the blockchain to deploy our wallet and use it.
- JavaScript
- Golang
import { TonClient } from '@ton/ton';

const client = new TonClient({
  endpoint: "https://toncenter.com/api/v2/jsonRPC",
  apiKey: "put your api key" // you can get an api key from @tonapibot bot in Telegram
});

client.sendFile(externalMessage.toBoc());
import (
  "context"
  "github.com/xssnick/tonutils-go/liteclient"
  "github.com/xssnick/tonutils-go/tl"
  "github.com/xssnick/tonutils-go/ton"
)

connection := liteclient.NewConnectionPool()
configUrl := "https://ton-blockchain.github.io/global.config.json"
err := connection.AddConnectionsFromConfigUrl(context.Background(), configUrl)
if err != nil {
  panic(err)
}
client := ton.NewAPIClient(connection)

var resp tl.Serializable
err = client.Client().QueryLiteserver(context.Background(), ton.SendMessage{Body: externalMessage.ToBOCWithFlags(false)}, &resp)
if err != nil {
  log.Fatalln(err.Error())
  return
}
Note that we have sent an internal message using mode 3. If it is necessary to repeat the deployment of the same wallet, the smart contract can be destroyed. To accomplish this, set the mode correctly by adding 128 (take the entire balance of the smart contract) + 32 (destroy the smart contract) which will = 160 to retrieve the remaining TON balance and deploy the wallet again.
It's important to note that for each new transaction the seqno will need to be increased by one.
💸 Working With Wallet Smart Contracts
After completing the first half of this tutorial we’re now much more familiar with wallet smart contracts and how they are developed and used. We learned how to deploy and destroy them and send messages without depending on pre-configured library functions. To apply more of what we learned above, in the next section, we’ll focus on building and sending more complex messages.
Sending Multiple Messages Simultaneously
As you may already know, one cell can store up to 1023 bits of data and up to 4 references to other cells. In the first section of this tutorial we detailed how internal messages are delivered in a ‘whole’ loop as a link and sent. This means it is possible to store up to 4 internal messages inside the external message. This allows four messages to be sent at the same time.
To accomplish this, it is necessary to create 4 different internal messages. We can do this manually or through a loop. We need to define 3 arrays: array of TON amount, array of comments, array of messages. For messages, we need to prepare another one array - internalMessages.
- JavaScript
- Golang
import { Cell } from '@ton/core';

const internalMessagesAmount = ["0.01", "0.02", "0.03", "0.04"];
const internalMessagesComment = [
  "Hello, TON! #1",
  "Hello, TON! #2",
  "", // Let's leave the third message without comment
  "Hello, TON! #4"
]
const destinationAddresses = [
  "Put any address that belongs to you",
  "Put any address that belongs to you",
  "Put any address that belongs to you",
  "Put any address that belongs to you"
] // All 4 addresses can be the same

let internalMessages:Cell[] = []; // array for our internal messages
import (
  "github.com/xssnick/tonutils-go/tvm/cell"
)

internalMessagesAmount := [4]string{"0.01", "0.02", "0.03", "0.04"}
internalMessagesComment := [4]string{
  "Hello, TON! #1",
  "Hello, TON! #2",
  "", // Let's leave the third message without comment
  "Hello, TON! #4",
}
destinationAddresses := [4]string{
  "Put any address that belongs to you",
  "Put any address that belongs to you",
  "Put any address that belongs to you",
  "Put any address that belongs to you",
} // All 4 addresses can be the same

var internalMessages [len(internalMessagesAmount)]*cell.Cell // array for our internal messages
Sending mode for all messages is set to mode 3. However, if different modes are required an array can be created to fulfill different purposes.
- JavaScript
- Golang
import { Address, beginCell, toNano } from '@ton/core';

for (let index = 0; index < internalMessagesAmount.length; index++) {
  const amount = internalMessagesAmount[index];

  let internalMessage = beginCell()
      .storeUint(0x18, 6) // bounce
      .storeAddress(Address.parse(destinationAddresses[index]))
      .storeCoins(toNano(amount))
      .storeUint(0, 1 + 4 + 4 + 64 + 32 + 1);

  /*
      At this stage, it is not clear if we will have a message body.
      So put a bit only for stateInit, and if we have a comment, in means
      we have a body message. In that case, set the bit to 1 and store the
      body as a reference.
  */

  if(internalMessagesComment[index] != "") {
    internalMessage.storeBit(1) // we store Message Body as a reference

    let internalMessageBody = beginCell()
      .storeUint(0, 32)
      .storeStringTail(internalMessagesComment[index])
      .endCell();

    internalMessage.storeRef(internalMessageBody);
  }
  else
    /*
        Since we do not have a message body, we indicate that
        the message body is in this message, but do not write it,
        which means it is absent. In that case, just set the bit to 0.
    */
    internalMessage.storeBit(0);

  internalMessages.push(internalMessage.endCell());
}
import (
  "github.com/xssnick/tonutils-go/address"
  "github.com/xssnick/tonutils-go/tlb"
)

for i := 0; i < len(internalMessagesAmount); i++ {
  amount := internalMessagesAmount[i]

  internalMessage := cell.BeginCell().
    MustStoreUInt(0x18, 6). // bounce
    MustStoreAddr(address.MustParseAddr(destinationAddresses[i])).
    MustStoreBigCoins(tlb.MustFromTON(amount).NanoTON()).
    MustStoreUInt(0, 1+4+4+64+32+1)

  /*
      At this stage, it is not clear if we will have a message body.
      So put a bit only for stateInit, and if we have a comment, in means
      we have a body message. In that case, set the bit to 1 and store the
      body as a reference.
  */

  if internalMessagesComment[i] != "" {
    internalMessage.MustStoreBoolBit(true) // we store Message Body as a reference

    internalMessageBody := cell.BeginCell().
      MustStoreUInt(0, 32).
      MustStoreStringSnake(internalMessagesComment[i]).
      EndCell()

    internalMessage.MustStoreRef(internalMessageBody)
  } else {
    /*
        Since we do not have a message body, we indicate that
        the message body is in this message, but do not write it,
        which means it is absent. In that case, just set the bit to 0.
    */
    internalMessage.MustStoreBoolBit(false)
  }
  internalMessages[i] = internalMessage.EndCell()
}
Now let's use our knowledge from chapter two to build a message for our wallet that can send 4 messages simultaneously:
- JavaScript
- Golang
import { TonClient } from '@ton/ton';
import { mnemonicToWalletKey } from '@ton/crypto';

const walletAddress = Address.parse('put your wallet address');
const client = new TonClient({
  endpoint: "https://toncenter.com/api/v2/jsonRPC",
  apiKey: "put your api key" // you can get an api key from @tonapibot bot in Telegram
});

const mnemonic = 'put your mnemonic'; // word1 word2 word3
let getMethodResult = await client.runMethod(walletAddress, "seqno"); // run "seqno" GET method from your wallet contract
let seqno = getMethodResult.stack.readNumber(); // get seqno from response

const mnemonicArray = mnemonic.split(' '); // get array from string
const keyPair = await mnemonicToWalletKey(mnemonicArray); // get Secret and Public keys from mnemonic

let toSign = beginCell()
  .storeUint(698983191, 32) // subwallet_id
  .storeUint(Math.floor(Date.now() / 1e3) + 60, 32) // Message expiration time, +60 = 1 minute
  .storeUint(seqno, 32); // store seqno
  // Do not forget that if we use Wallet V4, we need to add .storeUint(0, 8)
import (
	"context"
	"crypto/ed25519"
	"crypto/hmac"
	"crypto/sha512"
	"github.com/xssnick/tonutils-go/liteclient"
	"github.com/xssnick/tonutils-go/ton"
	"golang.org/x/crypto/pbkdf2"
	"log"
	"strings"
	"time"
)

walletAddress := address.MustParseAddr("put your wallet address")

connection := liteclient.NewConnectionPool()
configUrl := "https://ton-blockchain.github.io/global.config.json"
err := connection.AddConnectionsFromConfigUrl(context.Background(), configUrl)
if err != nil {
  panic(err)
}
client := ton.NewAPIClient(connection)

mnemonic := strings.Split("put your mnemonic", " ") // word1 word2 word3
// The following three lines will extract the private key using the mnemonic phrase.
// We will not go into cryptographic details. In the library tonutils-go, it is all implemented,
// but it immediately returns the finished object of the wallet with the address and ready-made methods.
// So we’ll have to write the lines to get the key separately. Goland IDE will automatically import
// all required libraries (crypto, pbkdf2 and others).
mac := hmac.New(sha512.New, []byte(strings.Join(mnemonic, " ")))
hash := mac.Sum(nil)
k := pbkdf2.Key(hash, []byte("TON default seed"), 100000, 32, sha512.New) // In TON libraries "TON default seed" is used as salt when getting keys
// 32 is a key len
privateKey := ed25519.NewKeyFromSeed(k)              // get private key

block, err := client.CurrentMasterchainInfo(context.Background()) // get current block, we will need it in requests to LiteServer
if err != nil {
  log.Fatalln("CurrentMasterchainInfo err:", err.Error())
  return
}

getMethodResult, err := client.RunGetMethod(context.Background(), block, walletAddress, "seqno") // run "seqno" GET method from your wallet contract
if err != nil {
  log.Fatalln("RunGetMethod err:", err.Error())
  return
}
seqno := getMethodResult.MustInt(0) // get seqno from response

toSign := cell.BeginCell().
  MustStoreUInt(698983191, 32). // subwallet_id | We consider this further
  MustStoreUInt(uint64(time.Now().UTC().Unix()+60), 32). // message expiration time, +60 = 1 minute
  MustStoreUInt(seqno.Uint64(), 32) // store seqno
  // Do not forget that if we use Wallet V4, we need to add MustStoreUInt(0, 8).
Next, we’ll add our messages that we built earlier in the loop:
- JavaScript
- Golang
for (let index = 0; index < internalMessages.length; index++) {
  const internalMessage = internalMessages[index];
  toSign.storeUint(3, 8) // store mode of our internal message
  toSign.storeRef(internalMessage) // store our internalMessage as a reference
}
for i := 0; i < len(internalMessages); i++ {
		internalMessage := internalMessages[i]
		toSign.MustStoreUInt(3, 8) // store mode of our internal message
		toSign.MustStoreRef(internalMessage) // store our internalMessage as a reference
}
Now that the above processes are complete, let’s sign our message, build an external message (as outlined in previous sections of this tutorial) and send it to the blockchain:
- JavaScript
- Golang
import { sign } from '@ton/crypto';

let signature = sign(toSign.endCell().hash(), keyPair.secretKey); // get the hash of our message to wallet smart contract and sign it to get signature

let body = beginCell()
    .storeBuffer(signature) // store signature
    .storeBuilder(toSign) // store our message
    .endCell();

let externalMessage = beginCell()
    .storeUint(0b10, 2) // ext_in_msg_info$10
    .storeUint(0, 2) // src -> addr_none
    .storeAddress(walletAddress) // Destination address
    .storeCoins(0) // Import Fee
    .storeBit(0) // No State Init
    .storeBit(1) // We store Message Body as a reference
    .storeRef(body) // Store Message Body as a reference
    .endCell();

client.sendFile(externalMessage.toBoc());
import (
  "github.com/xssnick/tonutils-go/tl"
)

signature := ed25519.Sign(privateKey, toSign.EndCell().Hash()) // get the hash of our message to wallet smart contract and sign it to get signature

body := cell.BeginCell().
  MustStoreSlice(signature, 512). // store signature
  MustStoreBuilder(toSign). // store our message
  EndCell()

externalMessage := cell.BeginCell().
  MustStoreUInt(0b10, 2). // ext_in_msg_info$10
  MustStoreUInt(0, 2). // src -> addr_none
  MustStoreAddr(walletAddress). // Destination address
  MustStoreCoins(0). // Import Fee
  MustStoreBoolBit(false). // No State Init
  MustStoreBoolBit(true). // We store Message Body as a reference
  MustStoreRef(body). // Store Message Body as a reference
  EndCell()

var resp tl.Serializable
err = client.Client().QueryLiteserver(context.Background(), ton.SendMessage{Body: externalMessage.ToBOCWithFlags(false)}, &resp)

if err != nil {
  log.Fatalln(err.Error())
  return
}
If an error related to the lite-server connection (Golang) occurs, the code must be run until the message can be sent. This is because the tonutils-go library uses several different lite-servers through the global configuration that have been specified in the code. However, not all lite-servers can accept our connection.
After this process is completed it is possible to use a TON blockchain explorer to verify that the wallet sent four messages to the addresses previously specified.
NFT Transfers
In addition to regular messages, users often send NFTs to each other. Unfortunately, not all libraries contain methods that are tailored for use with this type of smart contract. Therefore, it is necessary to create code that will allow us to build a message for sending NFTs. First, let's become more familiar with the TON NFT standard.
Especially, we need to understand TL-B for NFT Transfers in details.
-
query_id: Query ID has no value in terms of message processing. The NFT contract doesn't validate it; it only reads it. This value can be useful when a service wants to assign a specific query ID to each of its messages for identification purposes. Therefore, we will set it to 0. -
response_destination: After processing the ownership change message there will be extra TON. They will be sent to this address, if specified, otherwise remain on the NFT balance. -
custom_payload: The custom_payload is needed to carry out specific tasks and is not used with ordinary NFTs. -
forward_amount: If the forward_amount isn’t zero, the specified TON amount will be sent to the new owner. That way the new owner will be notified that they received something. -
forward_payload: The forward_payload is additional data that can be sent to the new owner together with the forward_amount. For example, using forward_payload allows users to add a comment during the transfer of the NFT, as shown in the tutorial earlier. However, although the forward_payload is written within TON’s NFT standard, blockchain explorers do not fully support displaying various details. The same problem also exists when displaying Jettons.
Now let's build the message itself:
- JavaScript
- Golang
import { Address, beginCell, toNano } from '@ton/core';

const destinationAddress = Address.parse("put your wallet where you want to send NFT");
const walletAddress = Address.parse("put your wallet which is the owner of NFT")
const nftAddress = Address.parse("put your nft address");

// We can add a comment, but it will not be displayed in the explorers,
// as it is not supported by them at the time of writing the tutorial.
const forwardPayload = beginCell()
  .storeUint(0, 32)
  .storeStringTail("Hello, TON!")
  .endCell();

const transferNftBody = beginCell()
  .storeUint(0x5fcc3d14, 32) // Opcode for NFT transfer
  .storeUint(0, 64) // query_id
  .storeAddress(destinationAddress) // new_owner
  .storeAddress(walletAddress) // response_destination for excesses
  .storeBit(0) // we do not have custom_payload
  .storeCoins(toNano("0.01")) // forward_amount
  .storeBit(1) // we store forward_payload as a reference
  .storeRef(forwardPayload) // store forward_payload as a .reference
  .endCell();

const internalMessage = beginCell().
  storeUint(0x18, 6). // bounce
  storeAddress(nftAddress).
  storeCoins(toNano("0.05")).
  storeUint(1, 1 + 4 + 4 + 64 + 32 + 1 + 1). // We store 1 that means we have body as a reference
  storeRef(transferNftBody).
  endCell();
import (
  "github.com/xssnick/tonutils-go/address"
  "github.com/xssnick/tonutils-go/tlb"
  "github.com/xssnick/tonutils-go/tvm/cell"
)

destinationAddress := address.MustParseAddr("put your wallet where you want to send NFT")
walletAddress := address.MustParseAddr("put your wallet which is the owner of NFT")
nftAddress := address.MustParseAddr("put your nft address")

// We can add a comment, but it will not be displayed in the explorers,
// as it is not supported by them at the time of writing the tutorial.
forwardPayload := cell.BeginCell().
  MustStoreUInt(0, 32).
  MustStoreStringSnake("Hello, TON!").
  EndCell()

transferNftBody := cell.BeginCell().
  MustStoreUInt(0x5fcc3d14, 32). // Opcode for NFT transfer
  MustStoreUInt(0, 64). // query_id
  MustStoreAddr(destinationAddress). // new_owner
  MustStoreAddr(walletAddress). // response_destination for excesses
  MustStoreBoolBit(false). // we do not have custom_payload
  MustStoreBigCoins(tlb.MustFromTON("0.01").NanoTON()). // forward_amount
  MustStoreBoolBit(true). // we store forward_payload as a reference
  MustStoreRef(forwardPayload). // store forward_payload as a reference
  EndCell()

internalMessage := cell.BeginCell().
  MustStoreUInt(0x18, 6). // bounce
  MustStoreAddr(nftAddress).
  MustStoreBigCoins(tlb.MustFromTON("0.05").NanoTON()).
  MustStoreUInt(1, 1 + 4 + 4 + 64 + 32 + 1 + 1). // We store 1 that means we have body as a reference
  MustStoreRef(transferNftBody).
  EndCell()
The NFT transfer opcode comes from the same standard. Now let's complete the message, as is laid out in the previous sections of this tutorial. The correct code needed to complete the message is found in the GitHub repository.
The same procedure can be completed with Jettons. To conduct this process, read the TL-B standart for jettons transfer. To this point specifically, a small difference between NFT and Jettons transfers exists.
Wallet v3 and Wallet v4 Get Methods
Smart contracts often make use of GET methods, however, they don’t run inside the blockchain but instead on the client side. GET methods have many uses and provide accessibility to different data types for smart contracts. For example, the get_nft_data() method in NFT smart contracts allows users to retrieve specific content, owner, and NFT collection information.
Below we’ll learn more about the basics of GET methods used with V3 and V4. Let’s start with the methods that are the same for both wallet versions:
| Method | Explanation |
|---|---|
| int seqno() | This method is needed to receive the current seqno and send messages with the correct value. In previous sections of this tutorial, this method was called often. |
| int get_public_key() | This method is used to retrive a public key. The get_public_key() is not broadly used, and can be used by different services. For example, some API services allow for the retrieval of numerous wallets with the same public key |
Now let’s move to the methods that only the V4 wallet makes use of:
| Method | Explanation |
|---|---|
| int get_subwallet_id() | Earlier in the tutorial we considered this. This method allows you to retrive subwallet_id. |
| int is_plugin_installed(int wc, int addr_hash) | Let’s us know if the plugin has been installed. To call this method it’s necessary to pass the workchain and the plugin address hash. |
| tuple get_plugin_list() | This method returns the address of the plugins that are installed. |
Let’s consider the get_public_key and the is_plugin_installed methods. These two methods were chosen because at first we would have to get a public key from 256 bits of data, and after that we would have to learn how to pass a slice and different types of data to GET methods. This is very useful to help us learn how to properly make use of these methods.
First we need a client that is capable of sending requests. Therefore, we’ll use a specific wallet address (EQDKbjIcfM6ezt8KjKJJLshZJJSqX7XOA4ff-W72r5gqPrHF) as an example:
- JavaScript
- Golang
import { TonClient } from '@ton/ton';
import { Address } from '@ton/core';

const client = new TonClient({
    endpoint: "https://toncenter.com/api/v2/jsonRPC",
    apiKey: "put your api key" // you can get an api key from @tonapibot bot in Telegram
});

const walletAddress = Address.parse("EQDKbjIcfM6ezt8KjKJJLshZJJSqX7XOA4ff-W72r5gqPrHF"); // my wallet address as an example
import (
  "context"
  "github.com/xssnick/tonutils-go/address"
  "github.com/xssnick/tonutils-go/liteclient"
  "github.com/xssnick/tonutils-go/ton"
  "log"
)

connection := liteclient.NewConnectionPool()
configUrl := "https://ton-blockchain.github.io/global.config.json"
err := connection.AddConnectionsFromConfigUrl(context.Background(), configUrl)
if err != nil {
  panic(err)
}
client := ton.NewAPIClient(connection)

block, err := client.CurrentMasterchainInfo(context.Background()) // get current block, we will need it in requests to LiteServer
if err != nil {
  log.Fatalln("CurrentMasterchainInfo err:", err.Error())
  return
}

walletAddress := address.MustParseAddr("EQDKbjIcfM6ezt8KjKJJLshZJJSqX7XOA4ff-W72r5gqPrHF") // my wallet address as an example
Now we need to call the GET method wallet.
- JavaScript
- Golang
// I always call runMethodWithError instead of runMethod to be able to check the exit_code of the called method.
let getResult = await client.runMethodWithError(walletAddress, "get_public_key"); // run get_public_key GET Method
const publicKeyUInt = getResult.stack.readBigNumber(); // read answer that contains uint256
const publicKey = publicKeyUInt.toString(16); // get hex string from bigint (uint256)
console.log(publicKey)
getResult, err := client.RunGetMethod(context.Background(), block, walletAddress, "get_public_key") // run get_public_key GET Method
if err != nil {
	log.Fatalln("RunGetMethod err:", err.Error())
	return
}

// We have a response as an array with values and should specify the index when reading it
// In the case of get_public_key, we have only one returned value that is stored at 0 index
publicKeyUInt := getResult.MustInt(0) // read answer that contains uint256
publicKey := publicKeyUInt.Text(16)   // get hex string from bigint (uint256)
log.Println(publicKey)
After the call is successfully completed the end result is an extremely large 256 bit number which must be translated into a hex string. The resulting hex string for the wallet address we provided above is as follows: 430db39b13cf3cb76bfa818b6b13417b82be2c6c389170fbe06795c71996b1f8.
Next, we leverage the TonAPI (/v1/wallet/findByPubkey method), by inputting the obtained hex string into the system and it is immediately clear that the first element in the array within the answer will identify my wallet.
Then we switch to the is_plugin_installed method. As an example, we’ll again use the wallet we used earlier (EQAM7M--HGyfxlErAIUODrxBA3yj5roBeYiTuy6BHgJ3Sx8k) and the plugin (EQBTKTis-SWYdupy99ozeOvnEBu8LRrQP_N9qwOTSAy3sQSZ):
- JavaScript
- Golang
const oldWalletAddress = Address.parse("EQAM7M--HGyfxlErAIUODrxBA3yj5roBeYiTuy6BHgJ3Sx8k"); // my old wallet address
const subscriptionAddress = Address.parseFriendly("EQBTKTis-SWYdupy99ozeOvnEBu8LRrQP_N9qwOTSAy3sQSZ"); // subscription plugin address which is already installed on the wallet
oldWalletAddress := address.MustParseAddr("EQAM7M--HGyfxlErAIUODrxBA3yj5roBeYiTuy6BHgJ3Sx8k")
subscriptionAddress := address.MustParseAddr("EQBTKTis-SWYdupy99ozeOvnEBu8LRrQP_N9qwOTSAy3sQSZ") // subscription plugin address which is already installed on the wallet
Now we need to retrieve the plugin’s hash address so the address can be translated into a number and sent to the GET Method.
- JavaScript
- Golang
const hash = BigInt(`0x${subscriptionAddress.address.hash.toString("hex")}`) ;

getResult = await client.runMethodWithError(oldWalletAddress, "is_plugin_installed",
[
    {type: "int", value: BigInt("0")}, // pass workchain as int
    {type: "int", value: hash} // pass plugin address hash as int
]);
console.log(getResult.stack.readNumber()); // -1
import (
  "math/big"
)

hash := big.NewInt(0).SetBytes(subscriptionAddress.Data())
// runGetMethod will automatically identify types of passed values
getResult, err = client.RunGetMethod(context.Background(), block, oldWalletAddress,
  "is_plugin_installed",
  0,    // pass workchain
  hash) // pass plugin address
if err != nil {
  log.Fatalln("RunGetMethod err:", err.Error())
  return
}

log.Println(getResult.MustInt(0)) // -1
The response must be -1, meaning the result is true. It is also possible to send a slice and a cell if required. It would be enough to create a Slice or Cell and transfer it instead of using the BigInt, specifying the appropriate type.
Contract Deployment via Wallet
In chapter three, we deployed a wallet. To accomplish this, we initially sent some TON and then a message from the wallet to deploy a smart contract. However, this process is not broadly used with external messages and is often primarily used for wallets only. While developing contracts, the deployment process is initialized by sending internal messages.
To accomplish this, will use the V3R2 wallet smart contract that was used in the third chapter.
In this case, we’ll set the subwallet_id to 3 or any other number needed to retrieve another address when using the same private key (it's changeable):
- JavaScript
- Golang
import { beginCell, Cell } from '@ton/core';
import { mnemonicToWalletKey } from '@ton/crypto';

const mnemonicArray = 'put your mnemonic'.split(" ");
const keyPair = await mnemonicToWalletKey(mnemonicArray); // extract private and public keys from mnemonic

const codeCell = Cell.fromBase64('te6ccgEBCAEAhgABFP8A9KQT9LzyyAsBAgEgAgMCAUgEBQCW8oMI1xgg0x/TH9MfAvgju/Jj7UTQ0x/TH9P/0VEyuvKhUUS68qIE+QFUEFX5EPKj+ACTINdKltMH1AL7AOgwAaTIyx/LH8v/ye1UAATQMAIBSAYHABe7Oc7UTQ0z8x1wv/gAEbjJftRNDXCx+A==');
const dataCell = beginCell()
    .storeUint(0, 32) // Seqno
    .storeUint(3, 32) // Subwallet ID
    .storeBuffer(keyPair.publicKey) // Public Key
    .endCell();

const stateInit = beginCell()
    .storeBit(0) // No split_depth
    .storeBit(0) // No special
    .storeBit(1) // We have code
    .storeRef(codeCell)
    .storeBit(1) // We have data
    .storeRef(dataCell)
    .storeBit(0) // No library
    .endCell();
import (
  "crypto/ed25519"
  "crypto/hmac"
  "crypto/sha512"
  "encoding/base64"
  "github.com/xssnick/tonutils-go/tvm/cell"
  "golang.org/x/crypto/pbkdf2"
  "strings"
)

mnemonicArray := strings.Split("put your mnemonic", " ")
// The following three lines will extract the private key using the mnemonic phrase.
// We will not go into cryptographic details. In the library tonutils-go, it is all implemented,
// but it immediately returns the finished object of the wallet with the address and ready-made methods.
// So we’ll have to write the lines to get the key separately. Goland IDE will automatically import
// all required libraries (crypto, pbkdf2 and others).
mac := hmac.New(sha512.New, []byte(strings.Join(mnemonicArray, " ")))
hash := mac.Sum(nil)
k := pbkdf2.Key(hash, []byte("TON default seed"), 100000, 32, sha512.New) // In TON libraries "TON default seed" is used as salt when getting keys
// 32 is a key len
privateKey := ed25519.NewKeyFromSeed(k)              // get private key
publicKey := privateKey.Public().(ed25519.PublicKey) // get public key from private key

BOCBytes, _ := base64.StdEncoding.DecodeString("te6ccgEBCAEAhgABFP8A9KQT9LzyyAsBAgEgAgMCAUgEBQCW8oMI1xgg0x/TH9MfAvgju/Jj7UTQ0x/TH9P/0VEyuvKhUUS68qIE+QFUEFX5EPKj+ACTINdKltMH1AL7AOgwAaTIyx/LH8v/ye1UAATQMAIBSAYHABe7Oc7UTQ0z8x1wv/gAEbjJftRNDXCx+A==")
codeCell, _ := cell.FromBOC(BOCBytes)
dataCell := cell.BeginCell().
  MustStoreUInt(0, 32).           // Seqno
  MustStoreUInt(3, 32).           // Subwallet ID
  MustStoreSlice(publicKey, 256). // Public Key
  EndCell()

stateInit := cell.BeginCell().
  MustStoreBoolBit(false). // No split_depth
  MustStoreBoolBit(false). // No special
  MustStoreBoolBit(true).  // We have code
  MustStoreRef(codeCell).
  MustStoreBoolBit(true). // We have data
  MustStoreRef(dataCell).
  MustStoreBoolBit(false). // No library
  EndCell()
Next we’ll retrieve the address from our contract and build the InternalMessage. Also we add the "Deploying..." comment to our message.
- JavaScript
- Golang
import { Address, toNano } from '@ton/core';

const contractAddress = new Address(0, stateInit.hash()); // get the hash of stateInit to get the address of our smart contract in workchain with ID 0
console.log(`Contract address: ${contractAddress.toString()}`); // Output contract address to console

const internalMessageBody = beginCell()
    .storeUint(0, 32)
    .storeStringTail('Deploying...')
    .endCell();

const internalMessage = beginCell()
    .storeUint(0x10, 6) // no bounce
    .storeAddress(contractAddress)
    .storeCoins(toNano('0.01'))
    .storeUint(0, 1 + 4 + 4 + 64 + 32)
    .storeBit(1) // We have State Init
    .storeBit(1) // We store State Init as a reference
    .storeRef(stateInit) // Store State Init as a reference
    .storeBit(1) // We store Message Body as a reference
    .storeRef(internalMessageBody) // Store Message Body Init as a reference
    .endCell();
import (
  "github.com/xssnick/tonutils-go/address"
  "github.com/xssnick/tonutils-go/tlb"
  "log"
)

contractAddress := address.NewAddress(0, 0, stateInit.Hash()) // get the hash of stateInit to get the address of our smart contract in workchain with ID 0
log.Println("Contract address:", contractAddress.String())   // Output contract address to console

internalMessageBody := cell.BeginCell().
  MustStoreUInt(0, 32).
  MustStoreStringSnake("Deploying...").
  EndCell()

internalMessage := cell.BeginCell().
  MustStoreUInt(0x10, 6). // no bounce
  MustStoreAddr(contractAddress).
  MustStoreBigCoins(tlb.MustFromTON("0.01").NanoTON()).
  MustStoreUInt(0, 1+4+4+64+32).
  MustStoreBoolBit(true).            // We have State Init
  MustStoreBoolBit(true).            // We store State Init as a reference
  MustStoreRef(stateInit).           // Store State Init as a reference
  MustStoreBoolBit(true).            // We store Message Body as a reference
  MustStoreRef(internalMessageBody). // Store Message Body Init as a reference
  EndCell()
Note that above, the bits have been specified and that the stateInit and internalMessageBody have been saved as references. Since the links are stored separately, we could write 4 (0b100) + 2 (0b10) + 1 (0b1) -> (4 + 2 + 1, 1 + 4 + 4 + 64 + 32 + 1 + 1 + 1) which means (0b111, 1 + 4 + 4 + 64 + 32 + 1 + 1 + 1) and then save two references.
Next, we’ll prepare a message for our wallet and send it:
- JavaScript
- Golang
import { TonClient } from '@ton/ton';
import { sign } from '@ton/crypto';

const client = new TonClient({
    endpoint: 'https://toncenter.com/api/v2/jsonRPC',
    apiKey: 'put your api key' // you can get an api key from @tonapibot bot in Telegram
});

const walletMnemonicArray = 'put your mnemonic'.split(' ');
const walletKeyPair = await mnemonicToWalletKey(walletMnemonicArray); // extract private and public keys from mnemonic
const walletAddress = Address.parse('put your wallet address with which you will deploy');
const getMethodResult = await client.runMethod(walletAddress, 'seqno'); // run "seqno" GET method from your wallet contract
const seqno = getMethodResult.stack.readNumber(); // get seqno from response

// message for our wallet
const toSign = beginCell()
    .storeUint(698983191, 32) // subwallet_id
    .storeUint(Math.floor(Date.now() / 1e3) + 60, 32) // Message expiration time, +60 = 1 minute
    .storeUint(seqno, 32) // store seqno
    // Do not forget that if we use Wallet V4, we need to add .storeUint(0, 8)
    .storeUint(3, 8)
    .storeRef(internalMessage);

const signature = sign(toSign.endCell().hash(), walletKeyPair.secretKey); // get the hash of our message to wallet smart contract and sign it to get signature
const body = beginCell()
    .storeBuffer(signature) // store signature
    .storeBuilder(toSign) // store our message
    .endCell();

const external = beginCell()
    .storeUint(0b10, 2) // indicate that it is an incoming external message
    .storeUint(0, 2) // src -> addr_none
    .storeAddress(walletAddress)
    .storeCoins(0) // Import fee
    .storeBit(0) // We do not have State Init
    .storeBit(1) // We store Message Body as a reference
    .storeRef(body) // Store Message Body as a reference
    .endCell();

console.log(external.toBoc().toString('base64'));
client.sendFile(external.toBoc());
import (
  "context"
  "github.com/xssnick/tonutils-go/liteclient"
  "github.com/xssnick/tonutils-go/tl"
  "github.com/xssnick/tonutils-go/ton"
  "time"
)

connection := liteclient.NewConnectionPool()
configUrl := "https://ton-blockchain.github.io/global.config.json"
err := connection.AddConnectionsFromConfigUrl(context.Background(), configUrl)
if err != nil {
  panic(err)
}
client := ton.NewAPIClient(connection)

block, err := client.CurrentMasterchainInfo(context.Background()) // get current block, we will need it in requests to LiteServer
if err != nil {
  log.Fatalln("CurrentMasterchainInfo err:", err.Error())
  return
}

walletMnemonicArray := strings.Split("put your mnemonic", " ")
mac = hmac.New(sha512.New, []byte(strings.Join(walletMnemonicArray, " ")))
hash = mac.Sum(nil)
k = pbkdf2.Key(hash, []byte("TON default seed"), 100000, 32, sha512.New) // In TON libraries "TON default seed" is used as salt when getting keys
// 32 is a key len
walletPrivateKey := ed25519.NewKeyFromSeed(k) // get private key
walletAddress := address.MustParseAddr("put your wallet address with which you will deploy")

getMethodResult, err := client.RunGetMethod(context.Background(), block, walletAddress, "seqno") // run "seqno" GET method from your wallet contract
if err != nil {
  log.Fatalln("RunGetMethod err:", err.Error())
  return
}
seqno := getMethodResult.MustInt(0) // get seqno from response

toSign := cell.BeginCell().
  MustStoreUInt(698983191, 32).                          // subwallet_id | We consider this further
  MustStoreUInt(uint64(time.Now().UTC().Unix()+60), 32). // message expiration time, +60 = 1 minute
  MustStoreUInt(seqno.Uint64(), 32).                     // store seqno
  // Do not forget that if we use Wallet V4, we need to add MustStoreUInt(0, 8).
  MustStoreUInt(3, 8).          // store mode of our internal message
  MustStoreRef(internalMessage) // store our internalMessage as a reference

signature := ed25519.Sign(walletPrivateKey, toSign.EndCell().Hash()) // get the hash of our message to wallet smart contract and sign it to get signature

body := cell.BeginCell().
  MustStoreSlice(signature, 512). // store signature
  MustStoreBuilder(toSign).       // store our message
  EndCell()

externalMessage := cell.BeginCell().
  MustStoreUInt(0b10, 2).       // ext_in_msg_info$10
  MustStoreUInt(0, 2).          // src -> addr_none
  MustStoreAddr(walletAddress). // Destination address
  MustStoreCoins(0).            // Import Fee
  MustStoreBoolBit(false).      // No State Init
  MustStoreBoolBit(true).       // We store Message Body as a reference
  MustStoreRef(body).           // Store Message Body as a reference
  EndCell()

var resp tl.Serializable
err = client.Client().QueryLiteserver(context.Background(), ton.SendMessage{Body: externalMessage.ToBOCWithFlags(false)}, &resp)

if err != nil {
  log.Fatalln(err.Error())
  return
}
This concludes our work with ordinary wallets. At this stage, you should have a strong understanding of how to interact with wallet smart contracts, send messages, and be able to use various library types.
🔥 High-Load Wallet V3
When working with many messages in a short period, there is a need for special wallet called High-Load Wallet. High-Load Wallet V2 was the main wallet on TON for a long time, but you had to be very careful with it. Otherwise, you could lock all funds.
With the advent of High-Load Wallet V3, this problem has been solved at the contract architecture level and consumes less gas. This chapter will cover the basics of High-Load Wallet V3 and important nuances to remember.
We will work with a slightly modified version of Wrapper for the contract, as it protects against some non-obvious mistakes.
Storage Structure
First of all, TL-B schema will help us in learning the structure of the contract storage:
storage$_ public_key:bits256 subwallet_id:uint32 old_queries:(HashmapE 14 ^Cell)
          queries:(HashmapE 14 ^Cell) last_clean_time:uint64 timeout:uint22
          = Storage;
You can read more about TL-B here.
In the contract storage, we can find the following fields:
| Field | Description |
|---|---|
| public_key | Public key of the contract. |
| subwallet_id | Wallet ID. It allows you to create many wallets using the same public key. |
| old_queries | Old queries that have already been processed and are outdated. They are moved here after each timeout. |
| queries | Queries that have been processed but are not yet outdated. |
| last_clean_time | The time of the last cleanup. If last_clean_time < (now() - timeout), old queries are moved to old_queries. If last_clean_time < (now() - 2 * timeout), both old_queries and queries are cleared. |
| timeout | The time after which queries are moved to old_queries. |
We will discuss more about working with processed queries in Replay Protection.
Shifts and Bits Numbers as Query ID
The Query ID is a number that consists of two parts: shift and bit_number:
int shift = msg_inner_slice~load_uint(KEY_SIZE);
int bit_number = msg_inner_slice~load_uint(BIT_NUMBER_SIZE);
The basic idea behind this is that each Query ID now only takes up 1 bit in the dictionary while not increasing gas consumption most of the time.
To start, the contract, using shift, tries to get the cell at that index in the old_queries dictionary:
(cell value, int found) = old_queries.udict_get_ref?(KEY_SIZE, shift);
If such a cell is found, it skips bit_number bits to reach the bit with index bit_number (it is important to understand the difference between bit_number as a quantity and bit_number as an index). If such a bit is found, it means that a query with such a Query ID has already been processed, and an error is thrown:
if (found) {
    slice value_slice = value.begin_parse();
    value_slice~skip_bits(bit_number);
    throw_if(error::already_executed, value_slice.preload_int(1));
}
The next step is to search the queries dictionary:
(cell value, int found) = queries.udict_get_ref?(KEY_SIZE, shift);
If such a cell is found, the contract cuts it into 2 parts: 0...bit_number-1 (head) and bit_number...1023 (tail). Then, one bit is read from the beginning of the tail (the number of this bit is equal to the bit_number variable if you start counting from 0, i.e. it is the index of the required bit). If it is positive, the request with such a Query ID has already been processed, and an error is thrown. Otherwise, the bit is set to 1, and all the pieces are merged into one cell again and written back into the queries dictionary:
builder new_value = null();
if (found) {
    slice value_slice = value.begin_parse();
    (slice tail, slice head) = value_slice.load_bits(bit_number);
    throw_if(error::already_executed, tail~load_int(1));
    new_value = begin_cell().store_slice(head).store_true().store_slice(tail);
} else {
    new_value = begin_cell().store_zeroes(bit_number).store_true().store_zeroes(CELL_BITS_SIZE - bit_number - 1);
}
If you familiarize yourself with the operation of the LDSLICEX opcode (the load_bits function uses this opcode), you will notice that the read data is returned first (head) and only then the remaining data (tail), but they are in reverse order in the contract code.
In fact, they go in reverse order, because in stdlib in the function signature, the returned data go in reverse order: (slice, slice) load_bits(slice s, int len) asm(s len -> 1 0) "LDSLICEX";. Here -> 1 0 means to return the argument with index 1 (tail) first, and then 0 (head).
So in effect we are working with a matrix where shift is the row index and bit_number is the column index. This allows us to store up to 1023 queries in a single cell, which means that gas consumption will only increase every 1023 queries due to adding a new cell to the dictionary. It is important to realize that this will be done if the values grow sequentially, not randomly, so it is necessary to properly increase Query ID, using a special class for this.
This approach allows storing a huge number of requests per timeout (1023 * 8192 = 8,380,416), but you may notice that the class HighloadQueryId supports 8,380,415. This is to ensure that there will always be 1 bit left for one emergency timeout request if the entire limit is exhausted. This value is set because of the limit on the maximum possible number of cells in an account stack on the blockchain (as of this writing).
For every cell that can hold 1023 requests, 2 cells in the dictionary are spent (one to store the key, the other for the value). If we take the current maximum shift value, the theoretical maximum is 8192 * 2 * 2 (we have two dictionaries: queries and old_queries) = 32,768 cells. If you increase the key size by a bit, it will no longer fit within the current limits.
Earlier in High-Load V2, each Query ID (64-bit) was stored in a separate cell in the dictionary and was a union of 32-bit fields expire_at and query_id. This led to a very fast growth in gas consumption when clearing old queries.
Replay Protection
As we know that external messages in TON have no sender and can be sent by anyone in the network, it is important to have a list of processed requests to avoid re-processing. For this purpose, High-Load Wallet V3 uses the queries and old_queries dictionaries and the last_clean_time and timeout values.
After the contract has completely retrieved all the data it needs from its storage, it checks to see when the last query dictionary cleanup occurred. If it was more than the timeout time ago, the contract moves all queries from queries to old_queries. If the last cleanup was more than timeout * 2 times ago, the contract cleans up old_queries in addition:
if (last_clean_time < (now() - timeout)) {
    (old_queries, queries) = (queries, null());
    if (last_clean_time < (now() - (timeout * 2))) {
        old_queries = null();
    }
    last_clean_time = now();
}
The reason for this is that the contract does not keep track of when exactly which request was executed. This means that if timeout is 3 hours, but the last request was executed one minute before reaching 3 hours, the request will be considered outdated one minute later, despite the 3-hour timeout. To solve this problem, the second dictionary stores the same queries for at least that much more time.
Theoretically, a query has a lifetime from timeout to timeout * 2, which means that when tracking which queries are outdated, it is good practice to wait at least timeout * 2 times to see if the query is obsolete.
Guaranteed Error-Free Action Phase
Once all the checks and cleanups have been completed, the contract can accept the message, make changes to its storage, and call the commit function, which will consider the compute phase a success even if some error is thrown next:
accept_message();

queries~udict_set_ref(KEY_SIZE, shift, new_value.end_cell());

set_data(begin_cell()
    .store_uint(public_key, PUBLIC_KEY_SIZE)
    .store_uint(subwallet_id, SUBWALLET_ID_SIZE)
    .store_dict(old_queries)
    .store_dict(queries)
    .store_uint(last_clean_time, TIMESTAMP_SIZE)
    .store_uint(timeout, TIMEOUT_SIZE)
    .end_cell());


commit();
This is done so that when executing further code if there is an error in the message the user is trying to send, the contract does not return to its previous state. Otherwise, the external will remain valid and can be accepted several times, resulting in wasted balance.
However, another issue must be addressed - possible errors during the Action Phase. Although we have a flag to ignore the mistakes (2) when sending a message, it doesn't work in all cases, so we need to ensure that no errors occur during this phase, which could cause the state to roll back and make commit() meaningless.
For this reason, instead of sending all messages directly, the contract sends itself a message with the internal_transfer opcode. This message is parsed in detail by the contract to ensure that no Action Phase error occurs:
throw_if(error::invalid_message_to_send, message_slice~load_uint(1)); ;; int_msg_info$0
int msg_flags = message_slice~load_uint(3); ;; ihr_disabled:Bool bounce:Bool bounced:Bool
if (is_bounced(msg_flags)) {
    return ();
}
slice message_source_adrress = message_slice~load_msg_addr(); ;; src
throw_unless(error::invalid_message_to_send, is_address_none(message_source_adrress));
message_slice~load_msg_addr(); ;; dest
message_slice~load_coins(); ;; value.coins
message_slice = message_slice.skip_dict(); ;; value.other extra-currencies
message_slice~load_coins(); ;; ihr_fee
message_slice~load_coins(); ;; fwd_fee
message_slice~skip_bits(64 + 32); ;; created_lt:uint64 created_at:uint32
int maybe_state_init = message_slice~load_uint(1);
throw_if(error::invalid_message_to_send, maybe_state_init); ;; throw if state-init included (state-init not supported)
int either_body = message_slice~load_int(1);
if (either_body) {
    message_slice~load_ref();
    message_slice.end_parse();
}
If any problem occurs while reading the data, it will still be Compute Phase. However, due to the presence of commit() this is not a problem and the transaction will still be considered a success. If all data has been read successfully, this is a guarantee that the Action Phase will pass without errors, as these checks cover all cases where the IGNORE_ERRORS (2) flag fails. The contract can then complete its work by sending a message:
;; send message with IGNORE_ERRORS flag to ignore errors in the action phase

send_raw_message(message_to_send, send_mode | SEND_MODE_IGNORE_ERRORS);
Internal Transfer
After internal_transfer reaches the contract, it loads the list of actions, sets them in the c5 register, and then applies set_code to protect against accidental code changes, which is also an action. Because of this, the number of messages that can be sent is 254 rather than 255, which is the limit on the blockchain. However, the contract can call itself to send more messages, which we will discuss later:
if (op == op::internal_transfer) {
    in_msg_body~skip_query_id();
    cell actions = in_msg_body.preload_ref();
    cell old_code = my_code();
    set_actions(actions);
    set_code(old_code); ;; prevent to change smart contract code
    return ();
}
When dealing with internal_transfer there is one important nuance. As we have discussed above, the contract sends a message to itself, but that message is entirely collected on the user side. The problem is that you need to correctly count how much TON will be attached to the message.
In the wrapper in the official repository this field is optional and if the user does not specify it, mode becomes 128, which means that the entire balance is sent. The problem is that in such a case there is a edge case.
Let's imagine that we want to send out a lot of tokens. After sending out the rest of the TON are returned to our wallet, since we set our address in the response_destination field. We start sending out multiple externals at the same time and the following situation occurs:
- External message A is received, processed and sends the entire contract balance via
internal_transfer. - Before external message B reaches, part of the commissions from the already completed token sent reaches. Hence, the non-empty contract balance allows the entire balance to be sent to internal message B again, but this time, a very small amount of TONs is sent.
- Internal message A is received, processed. Token sending messages are sent.
- Before internal message B reaches, external message C manages to reach and sends the entire balance again.
- When receiving internal message B, the contract has little TON, even if some extra TON from sending tokens will reach and the request fails with exit code = 37 on Action Phase (Insufficient Funds).
Thus the contract displays that the request has been processed when in fact it has not. To avoid this scenario, it is recommended to always put 1 TON on internal_transfer. Therefore, we are working with a modified wrapper that requires the user to specify the number of TONs. This value will suffice for all cases, since the external message size is limited to 64 KB and a message close to this limit will spend less than 1 TON.
High-Load Wallet V3 can send more than 254 messages, putting the remaining messages into the 254th message. This way internal_transfer will be processed several times. The wrapper automatically does this, and we won't have to worry about it, but recommended to take no more than 150 messages at a time to ensure that even complex messages will fit into an external message.
Although the external message limit is 64KB, the larger the external, the more likely it is to get lost in delivery, so 150 messages is the optimal solution.
GET Methods
High-Load Wallet V3 supports the 5 GET methods:
| Method | Explanation |
|---|---|
| int get_public_key() | Returns the public key of the contract. |
| int get_subwallet_id() | Returns the subwallet ID. |
| int get_last_clean_time() | Returns the time of the last cleaning. |
| int get_timeout() | Returns the timeout value. |
| int processed?(int query_id, int need_clean) | Returns whether the query_id has been processed. If need_clean is set to 1, then will first do the cleanup based on last_clean_time and timeout and then check for query_id in old_queries and queries. |
It is recommended to pass true for need_clean unless the situation requires otherwise since the most current dictionary states will then be returned.
Due to how the Query ID is organized in High-Load Wallet V3, we can send a message with the same Query ID again if it does not arrive without fear of the request being processed twice.
However, in such a case, we must consider that no more than timeout time has elapsed since the first sending attempt. Otherwise, the request may have been processed but already deleted from the dictionaries. Therefore, it is recommended to set timeout to no less than an hour and no more than 24 hours.
Deploying High-Load Wallet V3
To deploy a contract, we need 2 cells: code and date. For the code, we will use the following cell:
- JavaScript
import { Cell } from "@ton/core";

const HIGHLOAD_V3_CODE = Cell.fromBoc(Buffer.from('b5ee9c7241021001000228000114ff00f4a413f4bcf2c80b01020120020d02014803040078d020d74bc00101c060b0915be101d0d3030171b0915be0fa4030f828c705b39130e0d31f018210ae42e5a4ba9d8040d721d74cf82a01ed55fb04e030020120050a02027306070011adce76a2686b85ffc00201200809001aabb6ed44d0810122d721d70b3f0018aa3bed44d08307d721d70b1f0201200b0c001bb9a6eed44d0810162d721d70b15800e5b8bf2eda2edfb21ab09028409b0ed44d0810120d721f404f404d33fd315d1058e1bf82325a15210b99f326df82305aa0015a112b992306dde923033e2923033e25230800df40f6fa19ed021d721d70a00955f037fdb31e09130e259800df40f6fa19cd001d721d70a00937fdb31e0915be270801f6f2d48308d718d121f900ed44d0d3ffd31ff404f404d33fd315d1f82321a15220b98e12336df82324aa00a112b9926d32de58f82301de541675f910f2a106d0d31fd4d307d30cd309d33fd315d15168baf2a2515abaf2a6f8232aa15250bcf2a304f823bbf2a35304800df40f6fa199d024d721d70a00f2649130e20e01fe5309800df40f6fa18e13d05004d718d20001f264c858cf16cf8301cf168e1030c824cf40cf8384095005a1a514cf40e2f800c94039800df41704c8cbff13cb1ff40012f40012cb3f12cb15c9ed54f80f21d0d30001f265d3020171b0925f03e0fa4001d70b01c000f2a5fa4031fa0031f401fa0031fa00318060d721d300010f0020f265d2000193d431d19130e272b1fb00b585bf03', 'hex'))[0];
Unlike the other examples, here we will work with a ready-made wrapper, as it will be quite difficult and time-consuming to build each message manually. To create an instance of the HighloadWalletV3 class, we pass publicKey, subwalletId and timeout and also the code:
- JavaScript
import { TonClient } from "@ton/ton";
import { HighloadWalletV3 } from "./wrappers/HighloadWalletV3";
import { mnemonicToWalletKey } from "@ton/crypto";

const client = new TonClient({
    endpoint: 'https://toncenter.com/api/v2/jsonRPC',
    apiKey: 'put your api key' // you can get an api key from @tonapibot bot in Telegram
});

const walletMnemonicArray = 'put your mnemonic'.split(' ');
const walletKeyPair = await mnemonicToWalletKey(walletMnemonicArray); // extract private and public keys from mnemonic
const wallet = client.open(HighloadWalletV3.createFromConfig({
    publicKey: walletKeyPair.publicKey,
    subwalletId: 0x10ad,
    timeout: 60 * 60, // 1 hour
}, HIGHLOAD_V3_CODE));

console.log(`Wallet address: ${wallet.address.toString()}`);
Now we need a regular wallet, from which we will deploy the contract:
- JavaScript
import { WalletContractV3R2 } from "@ton/ton";

const deployerWalletMnemonicArray = 'put your mnemonic'.split(' ');
const deployerWalletKeyPair = await mnemonicToWalletKey(deployerWalletMnemonicArray); // extract private and public keys from mnemonic
const deployerWallet = client.open(WalletContractV3R2.create({
    publicKey: deployerWalletKeyPair.publicKey,
    workchain: 0
}));
console.log(`Deployer wallet address: ${deployerWallet.address.toString()}`);
If you have a V4 version wallet, you can use the WalletContractV4 class. Now, all we have to do is to deploy the contract:
- JavaScript
await wallet.sendDeploy(deployerWallet.sender(deployerWalletKeyPair.secretKey), toNano(0.05));
By viewing the address that was output to the console in explorer, we can verify that our wallet is deployed.
Sending High-Load Wallet V3 Messages
Sending messages is also done through the wrapper, but in this case we will need to additionally keep the Query ID up to date. First, let's get an instance of our wallet class:
- JavaScript
import { Address } from "@ton/core";
import { TonClient } from "@ton/ton";
import { HighloadWalletV3 } from "./wrappers/HighloadWalletV3";
import { mnemonicToWalletKey } from "@ton/crypto";

const client = new TonClient({
    endpoint: 'https://toncenter.com/api/v2/jsonRPC',
    apiKey: 'put your api key' // you can get an api key from @tonapibot bot in Telegram
});

const walletMnemonicArray = 'put your mnemonic'.split(' ');
const walletKeyPair = await mnemonicToWalletKey(walletMnemonicArray); // extract private and public keys from mnemonic
const wallet = client.open(HighloadWalletV3.createFromAddress(Address.parse('put your high-load wallet address')));
console.log(`Wallet address: ${wallet.address.toString()}`);
Now we need to create an instance of the HighloadQueryId class. This class makes it easy to work with shift and bit_number. To create it, we use the fromShiftAndBitNumber method:
- JavaScript
import { HighloadQueryId } from "./wrappers/HighloadQueryId";

const queryHandler = HighloadQueryId.fromShiftAndBitNumber(0n, 0n);
We put zeros here since this is the first request. However, if you've sent any messages before, you'll need to pick an unused combination of these values. Now let's create an array where we will store all our actions and add one action to it to get our TONs back:
- JavaScript
import { beginCell, internal, OutActionSendMsg, SendMode, toNano } from "@ton/core";

const actions: OutActionSendMsg[] = [];
actions.push({
    type: 'sendMsg',
    mode: SendMode.CARRY_ALL_REMAINING_BALANCE,
    outMsg: internal({
        to: Address.parse('put address of deployer wallet'),
        value: toNano(0),
        body: beginCell()
            .storeUint(0, 32)
            .storeStringTail('Hello, TON!')
            .endCell()
    })
});
Next we just need to fill in the subwalletId, timeout, internalMessageValue and createdAt fields to send the message:
- JavaScript
const subwalletId = 0x10ad;
const timeout = 60 * 60; // must be same as in the contract
const internalMessageValue = toNano(0.01); // in real case it is recommended to set the value to 1 TON
const createdAt = Math.floor(Date.now() / 1000) - 60; // LiteServers have some delay in time
await wallet.sendBatch(
    walletKeyPair.secretKey,
    actions,
    subwalletId,
    queryHandler,
    timeout,
    internalMessageValue,
    SendMode.PAY_GAS_SEPARATELY,
    createdAt
);
After submitting, we should use the getNext method in queryHandler and save the current value. In a real case, this value should be stored in the database and reset after the timeout * 2 time.
- JavaScript
queryHandler.getNext();
🔥 High-Load Wallet V2 (Outdated)
In some situations, sending a large number of messages per transaction may be necessary. As previously mentioned, ordinary wallets support sending up to 4 messages at a time by storing a maximum of 4 references in a single cell. High-load wallets only allow 255 messages to be sent at once. This restriction exists because the maximum number of outgoing messages (actions) in the blockchain’s config settings is set to 255.
Exchanges are probably the best example of where high-load wallets are used on a large scale. Established exchanges like Binance and others have extremely large user bases, this means that a large number of withdrawals messages are processed in short time periods. High-load wallets help address these withdrawal requests.
High-load wallet FunC code
First, let’s examine the code structure of high-load wallet smart contract:
() recv_external(slice in_msg) impure {
  var signature = in_msg~load_bits(512); ;; get signature from the message body
  var cs = in_msg;
  var (subwallet_id, query_id) = (cs~load_uint(32), cs~load_uint(64)); ;; get rest values from the message body
  var bound = (now() << 32); ;; bitwise left shift operation
  throw_if(35, query_id < bound); ;; throw an error if message has expired
  var ds = get_data().begin_parse();
  var (stored_subwallet, last_cleaned, public_key, old_queries) = (ds~load_uint(32), ds~load_uint(64), ds~load_uint(256), ds~load_dict()); ;; read values from storage
  ds.end_parse(); ;; make sure we do not have anything in ds
  (_, var found?) = old_queries.udict_get?(64, query_id); ;; check if we have already had such a request
  throw_if(32, found?); ;; if yes throw an error
  throw_unless(34, subwallet_id == stored_subwallet);
  throw_unless(35, check_signature(slice_hash(in_msg), signature, public_key));
  var dict = cs~load_dict(); ;; get dictionary with messages
  cs.end_parse(); ;; make sure we do not have anything in cs
  accept_message();
💡 Useful links:
You notice some differences from ordinary wallets. Now let’s take a closer look at more details of how high-load wallets work on TON (except subwallets as we have gone over this previously).
Using a Query ID In Place Of a Seqno
As we previously discussed, ordinary wallet seqno increase by 1 after each transaction. While using a wallet sequence we had to wait until this value was updated, then retrieve it using the GET method and send a new message.
This process takes a significant amount of time which high-load wallets are not designed for (as discussed above, they are meant to send a large number of messages very quickly). Therefore, high-load wallets on TON make use of the query_id.
If the same message request already exists, the contract won’t accept it, as it has already been processed:
var (stored_subwallet, last_cleaned, public_key, old_queries) = (ds~load_uint(32), ds~load_uint(64), ds~load_uint(256), ds~load_dict()); ;; read values from storage
ds.end_parse(); ;; make sure we do not have anything in ds
(_, var found?) = old_queries.udict_get?(64, query_id); ;; check if we have already had such a request
throw_if(32, found?); ;; if yes throw an error
This way, we are being protected from repeat messages, which was the role of seqno in ordinary wallets.
Sending Messages
After the contract has accepted the external message, a loop starts, in which the slices stored in the dictionary are taken. These slices store messages' modes and the messages themselves. Sending new messages takes place until the dictionary is empty.
int i = -1; ;; we write -1 because it will be the smallest value among all dictionary keys
do {
  (i, var cs, var f) = dict.idict_get_next?(16, i); ;; get the key and its corresponding value with the smallest key, which is greater than i
  if (f) { ;; check if any value was found
    var mode = cs~load_uint(8); ;; load message mode
    send_raw_message(cs~load_ref(), mode); ;; load message itself and send it
  }
} until (~ f); ;; if any value was found continue
💡 Useful link:
Note that if a value is found, f is always equal to -1 (true). The ~ -1 operation (bitwise not) will always return a value of 0, meaning that the loop should be continued. At the same time, when a dictionary is filled with messages, it is necessary to start calculating those with a value greater than -1 (e.g., 0) and continue increasing the value by 1 with each message. This structure allows messages to be sent in the correct sequential order.
Removing Expired Queries
Typically, smart contracts on TON pay for their own storage. This means that the amount of data smart contracts can store is limited to prevent high network loading. To allow the system to be more efficient, messages that are more than 64 seconds old are removed from the storage. This is conducted as follows:
bound -= (64 << 32);   ;; clean up records that have expired more than 64 seconds ago
old_queries~udict_set_builder(64, query_id, begin_cell()); ;; add current query to dictionary
var queries = old_queries; ;; copy dictionary to another variable
do {
  var (old_queries', i, _, f) = old_queries.udict_delete_get_min(64);
  f~touch();
  if (f) { ;; check if any value was found
    f = (i < bound); ;; check if more than 64 seconds have elapsed after expiration
  }
  if (f) {
    old_queries = old_queries'; ;; if yes save changes in our dictionary
    last_cleaned = i; ;; save last removed query
  }
} until (~ f);
💡 Useful link:
Note that it is necessary to interact with the f variable several times. Since the TVM is a stack machine, during each interaction with the f variable it is necessary to pop all values to get the desired variable. The f~touch() operation places the f variable at the top of the stack to optimize code execution.
Bitwise Operations
This section may seem a bit complicated for those who have not previously worked with bitwise operations. The following line of code can be seen in the smart contract code:
var bound = (now() << 32); ;; bitwise left shift operation
As a result 32 bits are added to the number on the right side. This means that existing values are moved 32 bits to the left. For example, let’s consider the number 3 and translate it into a binary form with a result of 11. Applying the 3 << 2 operation, 11 is moved 2 bit places. This means that two bits are added to the right of the string. In the end, we have 1100, which is 12.
The first thing to understand about this process is to remember that the now() function returns a result of uint32, meaning that the resulting value will be 32 bits. By shifting 32 bits to the left, space is opened up for another uint32, resulting in the correct query_id. This way, the timestamp and query_id can be combined within one variable for optimization.
Next, let’s consider the following line of code:
bound -= (64 << 32); ;; clean up the records that have expired more than 64 seconds ago
Above we performed an operation to shift the number 64 by 32 bits to subtract 64 seconds from our timestamp. This way we'll be able to compare past query_ids and see if they are less than the received value. If so, they expired more than 64 seconds ago:
if (f) { ;; check if any value has been found
  f = (i < bound); ;; check if more than 64 seconds have elapsed after expiration
}
To understand this better, let’s use the number 1625918400 as an example of a timestamp. Its binary representation (with the left-handed addition of zeros for 32 bits) is 01100000111010011000101111000000. By performing a 32 bit bitwise left shift, the result is 32 zeros at the end of the binary representation of our number.
After this is completed, it is possible to add any query_id (uint32). Then by subtracting 64 << 32 the result is a timestamp that 64 seconds ago had the same query_id. This fact can be verified by performing the following calculations ((1625918400 << 32) - (64 << 32)) >> 32. This way we can compare the necessary portions of our number (the timestamp) and at the same time the query_id does not interfere.
Storage Updates
After all operations are complete, the only task remaining is to save the new values in the storage:
  set_data(begin_cell()
    .store_uint(stored_subwallet, 32)
    .store_uint(last_cleaned, 64)
    .store_uint(public_key, 256)
    .store_dict(old_queries)
    .end_cell());
}
GET Methods
The last thing we have to consider before we dive into wallet deployment and message creation is high-load wallet GET methods:
| Method | Explanation |
|---|---|
| int processed?(int query_id) | Notifies the user if a particular request has been processed. This means it returns -1 if the request has been processed and 0 if it has not. Also, this method may return 1 if the answer is unknown since the request is old and no longer stored in the contract. |
| int get_public_key() | Rerive a public key. We have considered this method before. |
Let’s look at the int processed?(int query_id) method closely to help us to understand why we need to make use of the last_cleaned:
int processed?(int query_id) method_id {
  var ds = get_data().begin_parse();
  var (_, last_cleaned, _, old_queries) = (ds~load_uint(32), ds~load_uint(64), ds~load_uint(256), ds~load_dict());
  ds.end_parse();
  (_, var found) = old_queries.udict_get?(64, query_id);
  return found ? true : - (query_id <= last_cleaned);
}
The last_cleaned is retrieved from the storage of the contract and a dictionary of old queries. If the query is found, it is to be returned true, and if not, the expression - (query_id <= last_cleaned). The last_cleaned contains the last removed request with the highest timestamp, as we started with the minimum timestamp when deleting the requests.
This means that if the query_id passed to the method is smaller than the last last_cleaned value, it is impossible to determine whether it was ever in the contract or not. Therefore the query_id <= last_cleaned returns -1 while the minus before this expression changes the answer to 1. If query_id is larger than last_cleaned method, then it has not yet been processed.
Deploying High-Load Wallet V2
In order to deploy a high-load wallet it is necessary to generate a mnemonic key in advance, which will be used by the user. It is possible to use the same key that was used in previous sections of this tutorial.
To begin the process required to deploy a high-load wallet it's necessary to copy the code of the smart contract to the same directory where the stdlib.fc and wallet_v3 are located and remember to add #include "stdlib.fc"; to the beginning of the code. Next we’ll compile the high-load wallet code like we did in section three:
- JavaScript
import { compileFunc } from '@ton-community/func-js';
import fs from 'fs'
import { Cell } from '@ton/core';

const result = await compileFunc({
    targets: ['highload_wallet.fc'], // targets of your project
    sources: {
        'stdlib.fc': fs.readFileSync('./src/stdlib.fc', { encoding: 'utf-8' }),
        'highload_wallet.fc': fs.readFileSync('./src/highload_wallet.fc', { encoding: 'utf-8' }),
    }
});

if (result.status === 'error') {
console.error(result.message)
return;
}

const codeCell = Cell.fromBoc(Buffer.from(result.codeBoc, 'base64'))[0];

// now we have base64 encoded BOC with compiled code in result.codeBoc
console.log('Code BOC: ' + result.codeBoc);
console.log('\nHash: ' + codeCell.hash().toString('base64')); // get the hash of cell and convert in to base64 encoded string
The result will be the following output in the terminal:
Code BOC: te6ccgEBCQEA5QABFP8A9KQT9LzyyAsBAgEgAgMCAUgEBQHq8oMI1xgg0x/TP/gjqh9TILnyY+1E0NMf0z/T//QE0VNggED0Dm+hMfJgUXO68qIH+QFUEIf5EPKjAvQE0fgAf44WIYAQ9HhvpSCYAtMH1DAB+wCRMuIBs+ZbgyWhyEA0gED0Q4rmMQHIyx8Tyz/L//QAye1UCAAE0DACASAGBwAXvZznaiaGmvmOuF/8AEG+X5dqJoaY+Y6Z/p/5j6AmipEEAgegc30JjJLb/JXdHxQANCCAQPSWb6VsEiCUMFMDud4gkzM2AZJsIeKz

Hash: lJTRzI7fEvBWcaGpugmSEJbrUIEeGSTsZcPGKfu4CBI=
With the above result it is possible to use the base64 encoded output to retrieve the cell with our wallet code in other libraries and languages as follows:
- Golang
import (
  "encoding/base64"
  "github.com/xssnick/tonutils-go/tvm/cell"
  "log"
)

base64BOC := "te6ccgEBCQEA5QABFP8A9KQT9LzyyAsBAgEgAgMCAUgEBQHq8oMI1xgg0x/TP/gjqh9TILnyY+1E0NMf0z/T//QE0VNggED0Dm+hMfJgUXO68qIH+QFUEIf5EPKjAvQE0fgAf44WIYAQ9HhvpSCYAtMH1DAB+wCRMuIBs+ZbgyWhyEA0gED0Q4rmMQHIyx8Tyz/L//QAye1UCAAE0DACASAGBwAXvZznaiaGmvmOuF/8AEG+X5dqJoaY+Y6Z/p/5j6AmipEEAgegc30JjJLb/JXdHxQANCCAQPSWb6VsEiCUMFMDud4gkzM2AZJsIeKz" // save our base64 encoded output from compiler to variable
codeCellBytes, _ := base64.StdEncoding.DecodeString(base64BOC) // decode base64 in order to get byte array
codeCell, err := cell.FromBOC(codeCellBytes) // get cell with code from byte array
if err != nil { // check if there is any error
  panic(err)
}

log.Println("Hash:", base64.StdEncoding.EncodeToString(codeCell.Hash())) // get the hash of our cell, encode it to base64 because it has []byte type and output to the terminal
Now we need to retrieve a cell composed of its initial data, build a State Init, and calculate a high-load wallet address. After studying the smart contract code it became clear that the subwallet_id, last_cleaned, public_key and old_queries are sequentially stored in the storage:
- JavaScript
- Golang
import { Address, beginCell } from '@ton/core';
import { mnemonicToWalletKey } from '@ton/crypto';

const highloadMnemonicArray = 'put your mnemonic that you have generated and saved before'.split(' ');
const highloadKeyPair = await mnemonicToWalletKey(highloadMnemonicArray); // extract private and public keys from mnemonic

const dataCell = beginCell()
    .storeUint(698983191, 32) // Subwallet ID
    .storeUint(0, 64) // Last cleaned
    .storeBuffer(highloadKeyPair.publicKey) // Public Key
    .storeBit(0) // indicate that the dictionary is empty
    .endCell();

const stateInit = beginCell()
    .storeBit(0) // No split_depth
    .storeBit(0) // No special
    .storeBit(1) // We have code
    .storeRef(codeCell)
    .storeBit(1) // We have data
    .storeRef(dataCell)
    .storeBit(0) // No library
    .endCell();

const contractAddress = new Address(0, stateInit.hash()); // get the hash of stateInit to get the address of our smart contract in workchain with ID 0
console.log(`Contract address: ${contractAddress.toString()}`); // Output contract address to console
import (
  "crypto/ed25519"
  "crypto/hmac"
  "crypto/sha512"
  "github.com/xssnick/tonutils-go/address"
  "golang.org/x/crypto/pbkdf2"
  "strings"
)

highloadMnemonicArray := strings.Split("put your mnemonic that you have generated and saved before", " ") // word1 word2 word3
mac := hmac.New(sha512.New, []byte(strings.Join(highloadMnemonicArray, " ")))
hash := mac.Sum(nil)
k := pbkdf2.Key(hash, []byte("TON default seed"), 100000, 32, sha512.New) // In TON libraries "TON default seed" is used as salt when getting keys
// 32 is a key len
highloadPrivateKey := ed25519.NewKeyFromSeed(k)                      // get private key
highloadPublicKey := highloadPrivateKey.Public().(ed25519.PublicKey) // get public key from private key

dataCell := cell.BeginCell().
  MustStoreUInt(698983191, 32).           // Subwallet ID
  MustStoreUInt(0, 64).                   // Last cleaned
  MustStoreSlice(highloadPublicKey, 256). // Public Key
  MustStoreBoolBit(false).                // indicate that the dictionary is empty
  EndCell()

stateInit := cell.BeginCell().
  MustStoreBoolBit(false). // No split_depth
  MustStoreBoolBit(false). // No special
  MustStoreBoolBit(true).  // We have code
  MustStoreRef(codeCell).
  MustStoreBoolBit(true). // We have data
  MustStoreRef(dataCell).
  MustStoreBoolBit(false). // No library
  EndCell()

contractAddress := address.NewAddress(0, 0, stateInit.Hash()) // get the hash of stateInit to get the address of our smart contract in workchain with ID 0
log.Println("Contract address:", contractAddress.String())    // Output contract address to console
Everything we have detailed above follows the same steps as the contract deployment via wallet section. To better understanding, read the entire GitHub source code.
Sending High-Load Wallet V2 Messages
Now let’s program a high-load wallet to send several messages at the same time. For example, let's take 12 messages per transaction so that the gas fees are small.
To complete the transaction, the balance of the contract must be at least 0.5 TON.
Each message carry its own comment with code and the destination address will be the wallet from which we deployed:
- JavaScript
- Golang
import { Address, beginCell, Cell, toNano } from '@ton/core';

let internalMessages:Cell[] = [];
const walletAddress = Address.parse('put your wallet address from which you deployed high-load wallet');

for (let i = 0; i < 12; i++) {
    const internalMessageBody = beginCell()
        .storeUint(0, 32)
        .storeStringTail(`Hello, TON! #${i}`)
        .endCell();

    const internalMessage = beginCell()
        .storeUint(0x18, 6) // bounce
        .storeAddress(walletAddress)
        .storeCoins(toNano('0.01'))
        .storeUint(0, 1 + 4 + 4 + 64 + 32)
        .storeBit(0) // We do not have State Init
        .storeBit(1) // We store Message Body as a reference
        .storeRef(internalMessageBody) // Store Message Body Init as a reference
        .endCell();

    internalMessages.push(internalMessage);
}
import (
  "fmt"
  "github.com/xssnick/tonutils-go/address"
  "github.com/xssnick/tonutils-go/tlb"
  "github.com/xssnick/tonutils-go/tvm/cell"
)

var internalMessages []*cell.Cell
walletAddress := address.MustParseAddr("put your wallet address from which you deployed high-load wallet")

for i := 0; i < 12; i++ {
  comment := fmt.Sprintf("Hello, TON! #%d", i)
  internalMessageBody := cell.BeginCell().
    MustStoreUInt(0, 32).
    MustStoreBinarySnake([]byte(comment)).
    EndCell()

  internalMessage := cell.BeginCell().
    MustStoreUInt(0x18, 6). // bounce
    MustStoreAddr(walletAddress).
    MustStoreBigCoins(tlb.MustFromTON("0.001").NanoTON()).
    MustStoreUInt(0, 1+4+4+64+32).
    MustStoreBoolBit(false). // We do not have State Init
    MustStoreBoolBit(true). // We store Message Body as a reference
    MustStoreRef(internalMessageBody). // Store Message Body Init as a reference
    EndCell()

  messageData := cell.BeginCell().
    MustStoreUInt(3, 8). // transaction mode
    MustStoreRef(internalMessage).
    EndCell()

	internalMessages = append(internalMessages, messageData)
}
After completing the above process, the result is an array of internal messages. Next, it's necessary to create a dictionary for message storage and prepare and sign the message body. This is completed as follows:
- JavaScript
- Golang
import { Dictionary } from '@ton/core';
import { mnemonicToWalletKey, sign } from '@ton/crypto';
import * as crypto from 'crypto';

const dictionary = Dictionary.empty<number, Cell>(); // create an empty dictionary with the key as a number and the value as a cell
for (let i = 0; i < internalMessages.length; i++) {
    const internalMessage = internalMessages[i]; // get our message from an array
    dictionary.set(i, internalMessage); // save the message in the dictionary
}

const queryID = crypto.randomBytes(4).readUint32BE(); // create a random uint32 number, 4 bytes = 32 bits
const now = Math.floor(Date.now() / 1000); // get current timestamp
const timeout = 120; // timeout for message expiration, 120 seconds = 2 minutes
const finalQueryID = (BigInt(now + timeout) << 32n) + BigInt(queryID); // get our final query_id
console.log(finalQueryID); // print query_id. With this query_id we can call GET method to check if our request has been processed

const toSign = beginCell()
    .storeUint(698983191, 32) // subwallet_id
    .storeUint(finalQueryID, 64)
    // Here we create our own method that will save the
    // message mode and a reference to the message
    .storeDict(dictionary, Dictionary.Keys.Int(16), {
        serialize: (src, buidler) => {
            buidler.storeUint(3, 8); // save message mode, mode = 3
            buidler.storeRef(src); // save message as reference
        },
        // We won't actually use this, but this method
        // will help to read our dictionary that we saved
        parse: (src) => {
            let cell = beginCell()
                .storeUint(src.loadUint(8), 8)
                .storeRef(src.loadRef())
                .endCell();
            return cell;
        }
    }
);

const highloadMnemonicArray = 'put your high-load wallet mnemonic'.split(' ');
const highloadKeyPair = await mnemonicToWalletKey(highloadMnemonicArray); // extract private and public keys from mnemonic
const highloadWalletAddress = Address.parse('put your high-load wallet address');

const signature = sign(toSign.endCell().hash(), highloadKeyPair.secretKey); // get the hash of our message to wallet smart contract and sign it to get signature
import (
  "crypto/ed25519"
  "crypto/hmac"
  "crypto/sha512"
  "golang.org/x/crypto/pbkdf2"
  "log"
  "math/big"
  "math/rand"
  "strings"
  "time"
)

dictionary := cell.NewDict(16) // create an empty dictionary with the key as a number and the value as a cell
for i := 0; i < len(internalMessages); i++ {
  internalMessage := internalMessages[i]                             // get our message from an array
  err := dictionary.SetIntKey(big.NewInt(int64(i)), internalMessage) // save the message in the dictionary
  if err != nil {
    return
  }
}

queryID := rand.Uint32()
timeout := 120                                                               // timeout for message expiration, 120 seconds = 2 minutes
now := time.Now().Add(time.Duration(timeout)*time.Second).UTC().Unix() << 32 // get current timestamp + timeout
finalQueryID := uint64(now) + uint64(queryID)                                // get our final query_id
log.Println(finalQueryID)                                                    // print query_id. With this query_id we can call GET method to check if our request has been processed

toSign := cell.BeginCell().
  MustStoreUInt(698983191, 32). // subwallet_id
  MustStoreUInt(finalQueryID, 64).
  MustStoreDict(dictionary)

highloadMnemonicArray := strings.Split("put your high-load wallet mnemonic", " ") // word1 word2 word3
mac := hmac.New(sha512.New, []byte(strings.Join(highloadMnemonicArray, " ")))
hash := mac.Sum(nil)
k := pbkdf2.Key(hash, []byte("TON default seed"), 100000, 32, sha512.New) // In TON libraries "TON default seed" is used as salt when getting keys
// 32 is a key len
highloadPrivateKey := ed25519.NewKeyFromSeed(k) // get private key
highloadWalletAddress := address.MustParseAddr("put your high-load wallet address")

signature := ed25519.Sign(highloadPrivateKey, toSign.EndCell().Hash())
Note that while using JavaScript and TypeScript that our messages were saved into an array without using a send mode. This occurs because during using @ton/ton library, it is expected that developer will implement process of serialization and deserialization by own hands. Therefore, a method is passed that first saves the message mode after it saves the message itself. If we make use of the Dictionary.Values.Cell() specification for the value method, it saves the entire message as a cell reference without saving the mode separately.
Next we’ll create an external message and send it to the blockchain using the following code:
- JavaScript
- Golang
import { TonClient } from '@ton/ton';

const body = beginCell()
    .storeBuffer(signature) // store signature
    .storeBuilder(toSign) // store our message
    .endCell();

const externalMessage = beginCell()
    .storeUint(0b10, 2) // indicate that it is an incoming external message
    .storeUint(0, 2) // src -> addr_none
    .storeAddress(highloadWalletAddress)
    .storeCoins(0) // Import fee
    .storeBit(0) // We do not have State Init
    .storeBit(1) // We store Message Body as a reference
    .storeRef(body) // Store Message Body as a reference
    .endCell();

// We do not need a key here as we will be sending 1 request per second
const client = new TonClient({
    endpoint: 'https://toncenter.com/api/v2/jsonRPC',
    // apiKey: 'put your api key' // you can get an api key from @tonapibot bot in Telegram
});

client.sendFile(externalMessage.toBoc());
import (
  "context"
  "github.com/xssnick/tonutils-go/liteclient"
  "github.com/xssnick/tonutils-go/tl"
  "github.com/xssnick/tonutils-go/ton"
)

body := cell.BeginCell().
  MustStoreSlice(signature, 512). // store signature
  MustStoreBuilder(toSign). // store our message
  EndCell()

externalMessage := cell.BeginCell().
  MustStoreUInt(0b10, 2). // ext_in_msg_info$10
  MustStoreUInt(0, 2). // src -> addr_none
  MustStoreAddr(highloadWalletAddress). // Destination address
  MustStoreCoins(0). // Import Fee
  MustStoreBoolBit(false). // No State Init
  MustStoreBoolBit(true). // We store Message Body as a reference
  MustStoreRef(body). // Store Message Body as a reference
  EndCell()

connection := liteclient.NewConnectionPool()
configUrl := "https://ton-blockchain.github.io/global.config.json"
err := connection.AddConnectionsFromConfigUrl(context.Background(), configUrl)
if err != nil {
  panic(err)
}
client := ton.NewAPIClient(connection)

var resp tl.Serializable
err = client.Client().QueryLiteserver(context.Background(), ton.SendMessage{Body: externalMessage.ToBOCWithFlags(false)}, &resp)

if err != nil {
  log.Fatalln(err.Error())
  return
}
After this process is completed it is possible to look up our wallet and verify that 12 outgoing messages were sent on our wallet. Is it also possible to call the processed? GET method using the query_id we initially used in the console. If this request has been processed correctly it provides a result of -1 (true).
🏁 Conclusion
This tutorial provided us with a better understanding of how different wallet types operate on TON Blockchain. It also allowed us to learn how to create external and internal messages without using predefined library methods.
This helps us to be independent of using libraries and to understand the structure of TON Blockchain in a more in-depth way. We also learned how to use high-load wallets and analyzed many details to do with different data types and various operations.
🧩 Next Steps
Reading the documentation provided above is a complex undertaking and it’s difficult to understand the entirety of the TON platform. However, it is a good exercise for those passionate about building on the TON. Another suggestion is to begin learning how to write smart contracts on TON by consulting the following resources: FunC Overview, Best Practices, Examples of Smart Contracts, FunC Cookbook
Additionally, it is recommended that readers familiarize themselves with the following documents in more detail: ton.pdf and tblkch.pdf documents.
📬 About the Author
If you have any questions, comments, or suggestions please reach out to the author of this documentation section on Telegram (@aSpite or @SpiteMoriarty) or GitHub.
📖 See Also
-
Useful concept documents(may include outdated information): ton.pdf, tblkch.pdf, tvm.pdf
The main sources of code:
Official documentation:
External references: